The renovation fizzle is in effect.

You know what I'm talking about...the hype of the renovation has died down, things are functioning so the pressure is off, everything left to do you can live with undone.   I am officially down in the dumps about my house again.  And yes, this is normal.  I say it to everyone else and I know it is part of the process, but it still sucks.

We are all familiar with it, it doesn't just happen with renovations.  Life takes over, priorities change and we have to move on to the other facets of our wonderfully complex lives.  Next thing you know, you're living with windows and doors with spray foam hanging out all over the place for two years and you don't even notice it anymore.   And now you understand the multitude of candidates available for shows like "Disaster DIY" on HGTV.  It just happens.

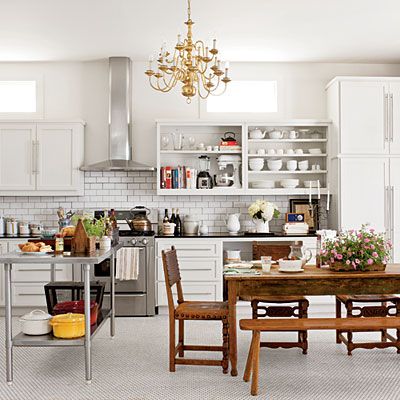
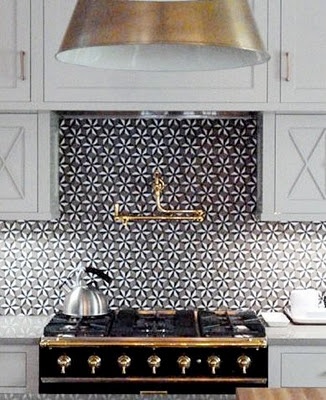
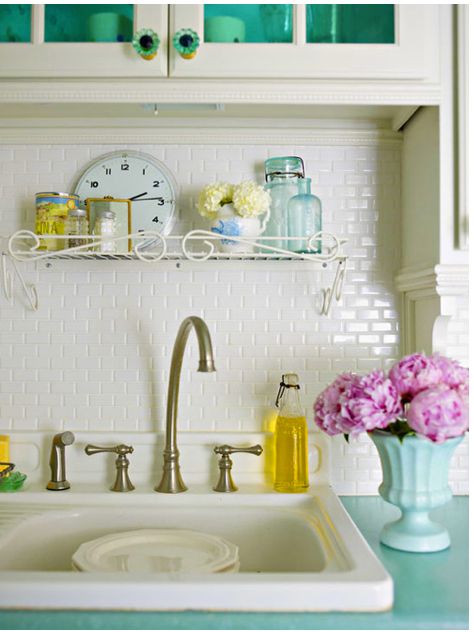
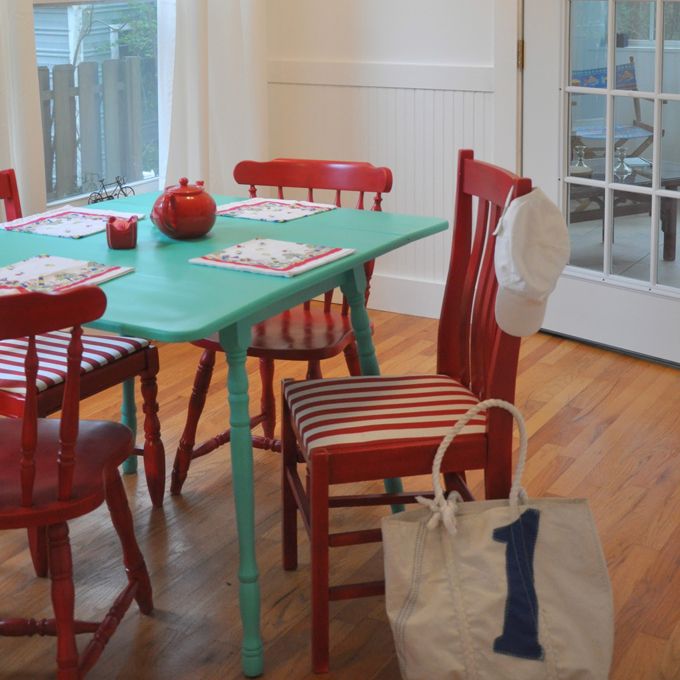
But, I WILL NOT let this slump get the best of me!  Here is my cure - I am going to review the kitchens that inspired me to do this in the first place.   They won't look like my kitchen, but, they motivated me to get to it and I'm hoping they will again.   And I'm also hoping my husband and contractors have a look and feel inspired to wrap it up and make their work in my kitchen shine as well.    In fact, they are going to get a special e-mail with a link to this page just to help out.   They love it when I'm in this mode.  They call it nagging, but I call it getting s*&t done!

 Source: www.southernliving.com

Source: www.youpaidmorethanme.blogspot.com

Source: www.wherethesidewalkbegins.blogspot.com

Source: www.doyoulovewhereyoulive.com

Source: www.rebeccapurdy.com

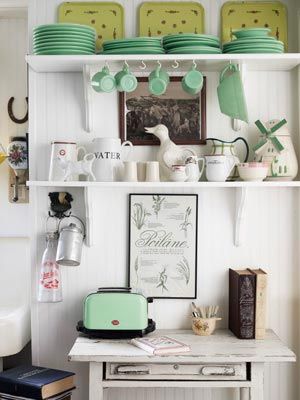
Source: www.countryliving.com

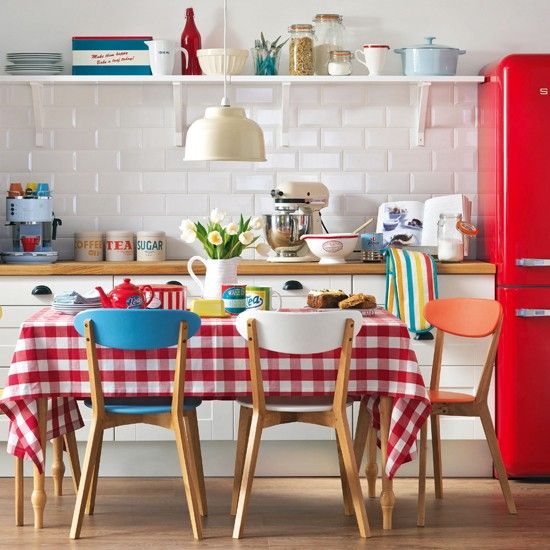
Source: www.housetohome.co.uk

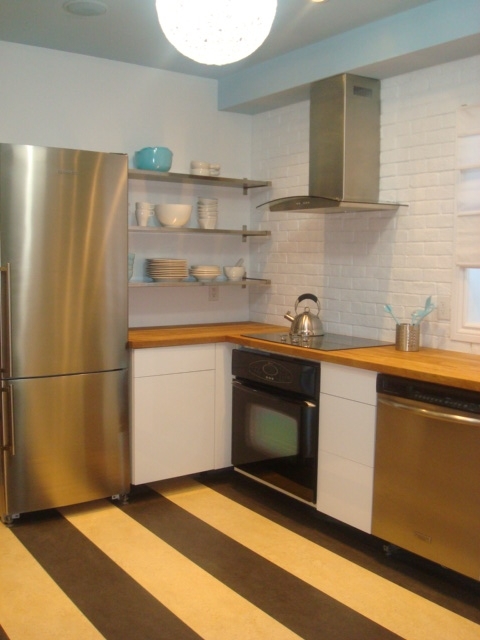
Hope you enjoyed some of my fave kitchens and cross your fingers that I'll have some of my own beautiful kitchen shots to share in the VERY near future.  Take care and connect soon!

So close, yet so far.

This is the part of a renovation that I love, but also hate.  It's almost finished and the basics are functioning, but, the little stuff takes the longest to do.   This finishing part is excruciating to me - I can see the final product, but the trim isn't finished, the plate covers have to go on, the wall needs patching, and so on.  It's the part with the least amount of impact, but most amount of work.  

It's where people start saying "we can live with that for awhile" and it never gets done - and running out of money starts to dictate the decisions.  This is definitely one downfall of the DIYer version of renovation.  It's also why were are leaving our hideous honey-coloured living room floors for another year.  Out of time, energy and money.  But, it's all about compromising without sacrificing your total vision entirely.  The floors can wait another year - I don't think they will mind.

But, here are the positive things.

I have grey grout!


When it first went on, I panicked.  I thought I had really screwed up.  I usually experiment at my house, so clients don't do the suffering and was sure this was an experiment that failed.   It didn't help that everyone that looked at it said it screwed up their eyes and reminded them of that computer-generated artwork where you had to go cross-eyed to see the image!  However, with a little elbow grease I worked the grout back a little and am now thrilled with the result.  If you stare too long, things still go wonky, but that will stop once I have kitchen things in front of it, and then it will sing!

And my countertop is installed!  Look at it in all it's simple off-white-with-a-touch-of-sparkle glory (not to mention the amazing shadows at dinner time):

Thank you again John from Beyond Tile & Stone for this one!

And a special thank you to Kevin from TMK Mechanical for doing all of the plumbing!  You may have noticed my faucet and soap dispenser also installed.   I have water - the best news for days!

And my lights, my wonderful lights.  They are nothing you haven't seen, but, I love the impact of them all together over the island.   And Paul (my electrician) was wrong - they aren't too big for the island and I don't care what he says about it.  You definitely couldn't ask for a more honest electrcian at RK Electric.

But you were defintely right about my hall lights - I don't need the cork insert for waterproofing because I'm inside.  You can keep making fun of me for that.  Until you see how great it's all going to look pulled together.   

Here's Paul's response when I asked him how much longer he'd be working at my house (this is the polite version of the photo - the other one involved a middle finger!)

And my oven hood is up! But, the old stove is in (I guess it's not THAT bad...)

Well, I think that's it for now.  We are going to start pulling it together soon and I've started unpacking my stuff. I'm not going to show final photos until I have "propped" it all.   I thought: "Hey, I prop rooms for everyone else, why not do it for myself?" So that's what I'll do.  I'm pretty sure I won't start crying when I walk in for the final reveal though, but who knows?  I am known to cry easily (What? Some commercials are REALLY moving). Take care for now and next post, there will be some real beauty shots!

Things I don't seem to tire of...

Over the years, I have started many collections and am drawn repeatedly to the same things.   That's not to say I don't also like trends.  There is definitely a time and place for trends in most designed spaces.   But, there are always the things that are comforting and reliable and that I will always love in a space.  At least I have for the last  10 odd years.   I thought I would share a few of the things I never seem to tire of...

Jade-ite Dishes (Oh. and salt and pepper shakers too!)

Mixing patterns - adds such a dynamic quality to a space.

Small cabinets with doors and latches 

(and, in case you don't already know - GREEN)

Old Suitcases

Drawers, especially metal ones

And chalkboard paint

Our wall in our kitchen is blackboard paint and we truly use it all the time.  Most of the time it looks a bit of a mess, but I think it still looks okay this way.   My husband and I use it for our brainstorming sessions about furniture design, kitchen layout (that's his chicken scratch way of writing "kitchen" by the way - it really doesn't say kill) and lists.  Those are the preliminary drawings for the side tables we collaborated on (see entry Build up to Built-ins).  

 Thanks for having a look...check back soon!

Build up to built-ins

My husband is insisting that he build our built-ins for our bedroom. He's not a cabinet maker or woodworker, but it is definitely an interest. However, he doesn't have a lot of experience (and quite honestly, he doesn't like to take advice from "someone" who has taken a few courses in furniture design!). Therefore, I'm not so keen on the idea. But we reached an agreement: he could try it out first with some side tables for our couch. It took a couple of attempts before I suggested we use the extra drawers from the piece we have (above photo). Then, he built a box around them, added a shelf, threw on some vintage legs and...

Voila! We have side tables...

All in all, he did a great job. There were a couple of heated discussions about it, but we are stronger because of it - I think? I picked a bright colour because I wanted to punch it up and who doesn't like yellow right now? When I'm tired of yellow, I'll just paint it again. This is partly why I didn't want to invest in something too expensive because I like to change things up a lot. So, this was re-using something we already had and enabling us to have it for a long time. Unless it falls apart...which it probably NEVER will because of the sheer amount of glue holding it together. And yes, he is allowed to do the built-ins - he promised less glue and better use of proper wood joints! I will keep you posted on the results....


DIY: Customize a shower curtain

I have been having so much trouble finding a shower curtain.    I wanted something that still let light into the bathroom, but had a little bit of detail to add some interest.   I found some simple white ones at Ikea and you couldn't beat the price plus it wasn't vinyl, so non-toxic.  This is good since I have two children that spend lengths of time in the bath.  The shower curtain met the requirements but was so boring.  So I decided to draw on it with an extra-large Sharpie marker.   I mimicked the "faux bois" fabric that was at Ikea not too long ago, but with a little less detail.  

Step 1: Tape down some craft or scrap paper ont a long table

Step 2: Tape down the first segment of the shower curtain

Step 3: Start drawing!  Make sure to use a permanent marker.  I stick with the Sharpie brand because I know that that stuff doesn't come out.

Step 4: Test a small area to ensure that the marker doesn't run.   If you are worried, you might want to put it in the dryer for a few minutes or iron it at a lower temperature.

I did a faux bois pattern which was simple because I didn't have to worry about the lines being perfect and could really improvise where I wanted a lot of pattern and a little pattern.  I think you could just about do anything you feel like or even have your kids do one.  The permanent marker might not be appropriate for them, but, non-toxic fabric paint would work just as well (just follow the instructions on the product).   Have fun doing it!  

DIY: Bulletin Board

Here is a simple way to make a bulletin board.  It's a fast and easy way to add colour and interest to a room.   You can make it small or large, horizontal or vertical, even change the fabrics from square to square.

You will need the following; fabric, acoustic ceiling tiles (from any hardware store), glue gun and scissors. 

1. Cut fabric 1.5" larger than the ceiling tile you have chosen

2. Glue fabric to back of tile (the tile has a lip which is a great place for the glue)

3. Trim excess fabric

4. Attach tile(s) to wall in whatever pattern you choose.   The way you attach the tile will depend on the type of wall you are applying it to (I sound like Ikea instructions right now!)

5. Use regular push pins to attach objects.


Kitchen Art

Just wanted to share an idea that I used in a kitchen renovation on Disaster DIY way back in Season 2.  It was one of my favourite kitchens not only because the homeowners were great, but because I got to use turquoise and red together.    I wanted to do something meaningful for them, so I decided to take photos of her extensive antique egg beater collection and created some unique art for them.  Here are some more...can you guess what kitchen it is in the Picture Gallery?