A nip here and a tuck there...

It's a debate that many of us have had: Should we sell and find/build a new house OR make the one we have work?  Well, this client decided to stay and fix what they had and I think the results are spectacular.   Plus, I got to work with amazing clients and a wonderful team that made a dream become a reality.   And it all started with Alan from Alan Heron Homes who was tasked with making it all happen.

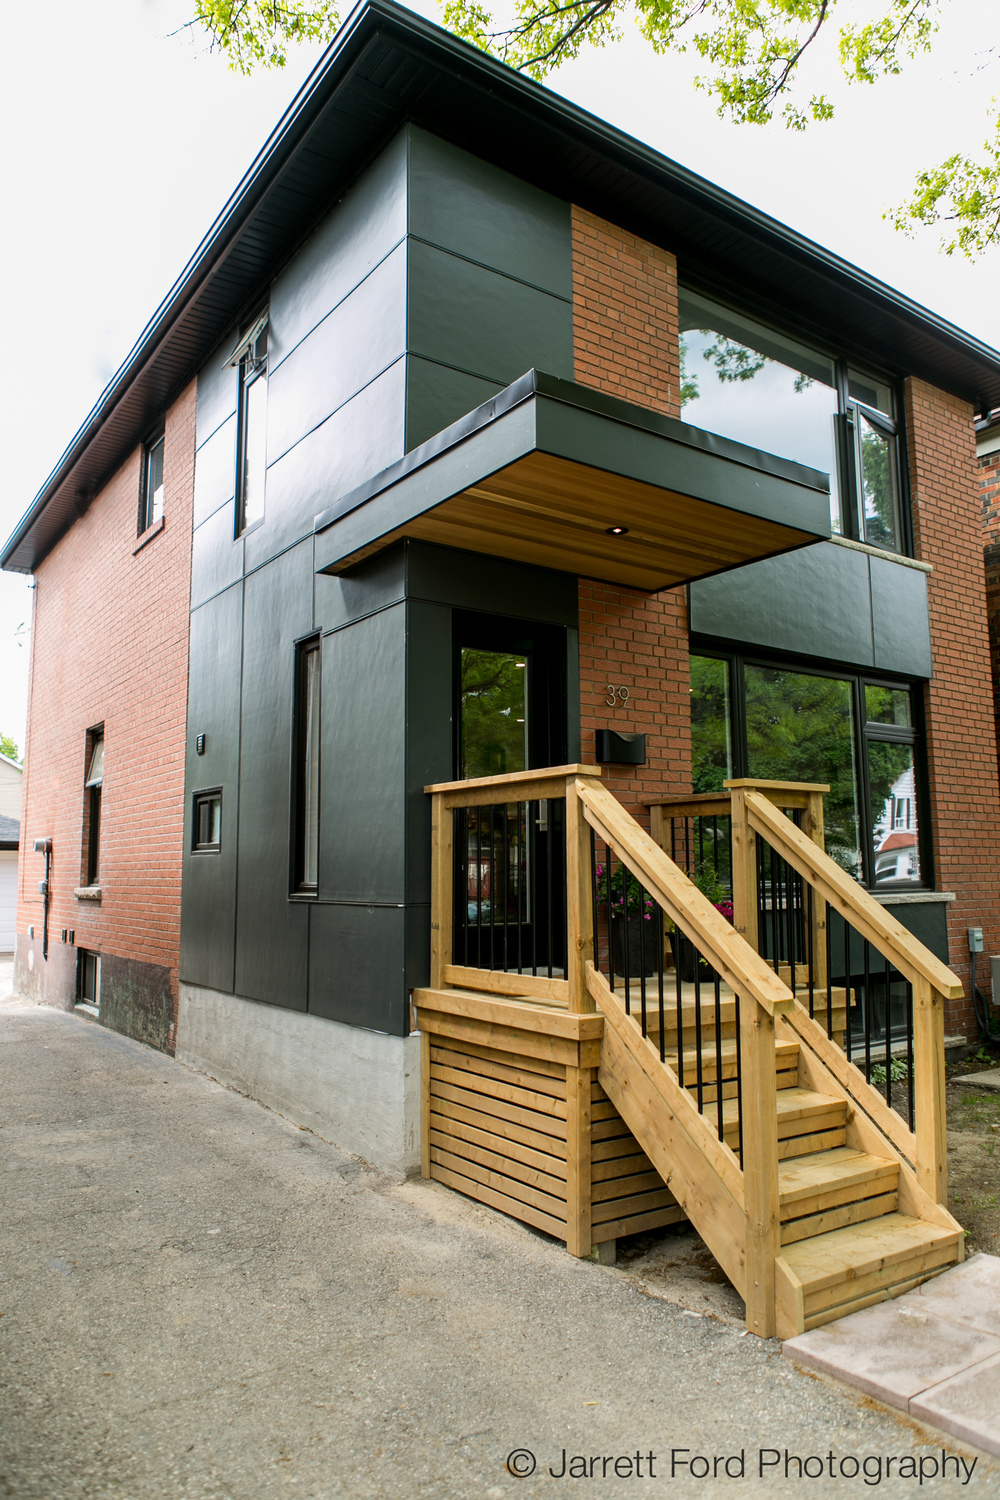
First order of business: Modernize the exterior and re-locate the entrance.  This is where Will Hudson of Hudson Architecture started to make the client's dream a reality.  The entrance was originally on the side of the house and didn't allow for an inch of entrance space, which was a huge hassle for this family of six.  Re-locating the entrance allowed for a completely different layout on the main floor and the addition of an Ensuite bathroom in the Master bedroom.


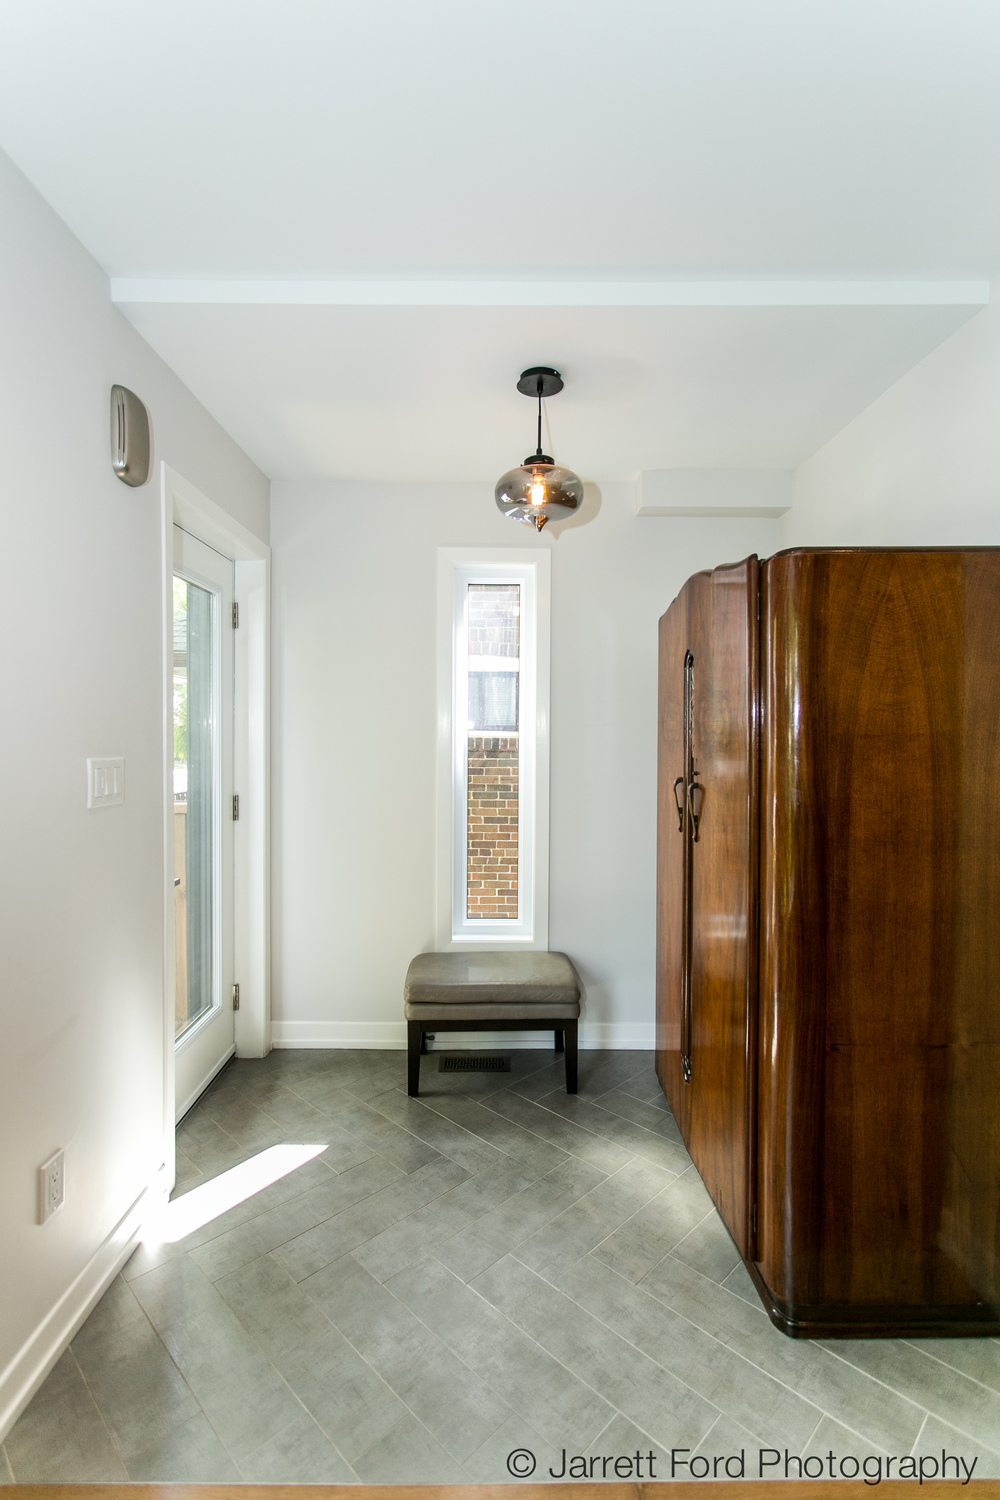
The new entrance allows space to move. The antique armoire is a family treasure and this location gives it more presence and creates a focal point upon entering the house.  It also sets the tone for the home; mixing old with new; modern with vintage.

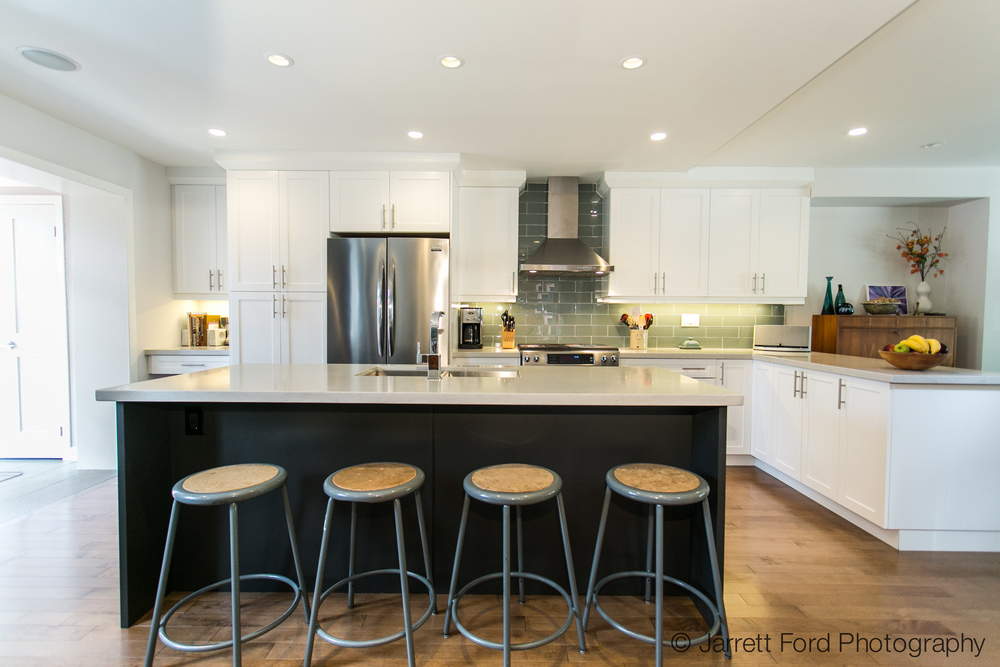
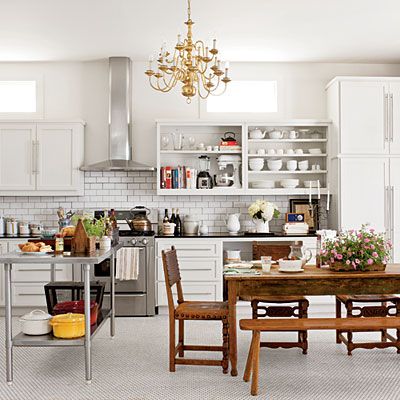
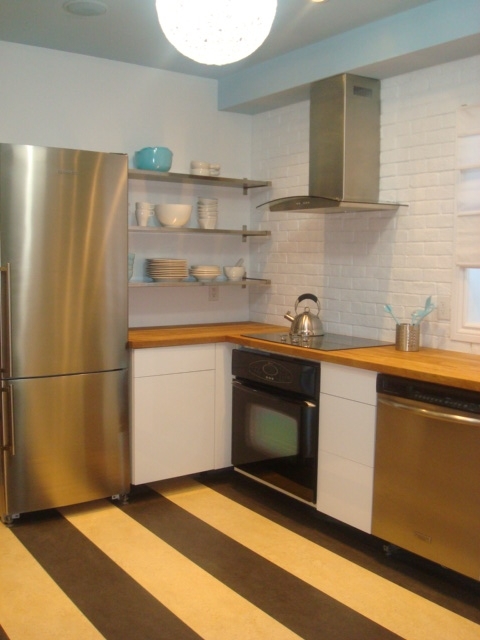
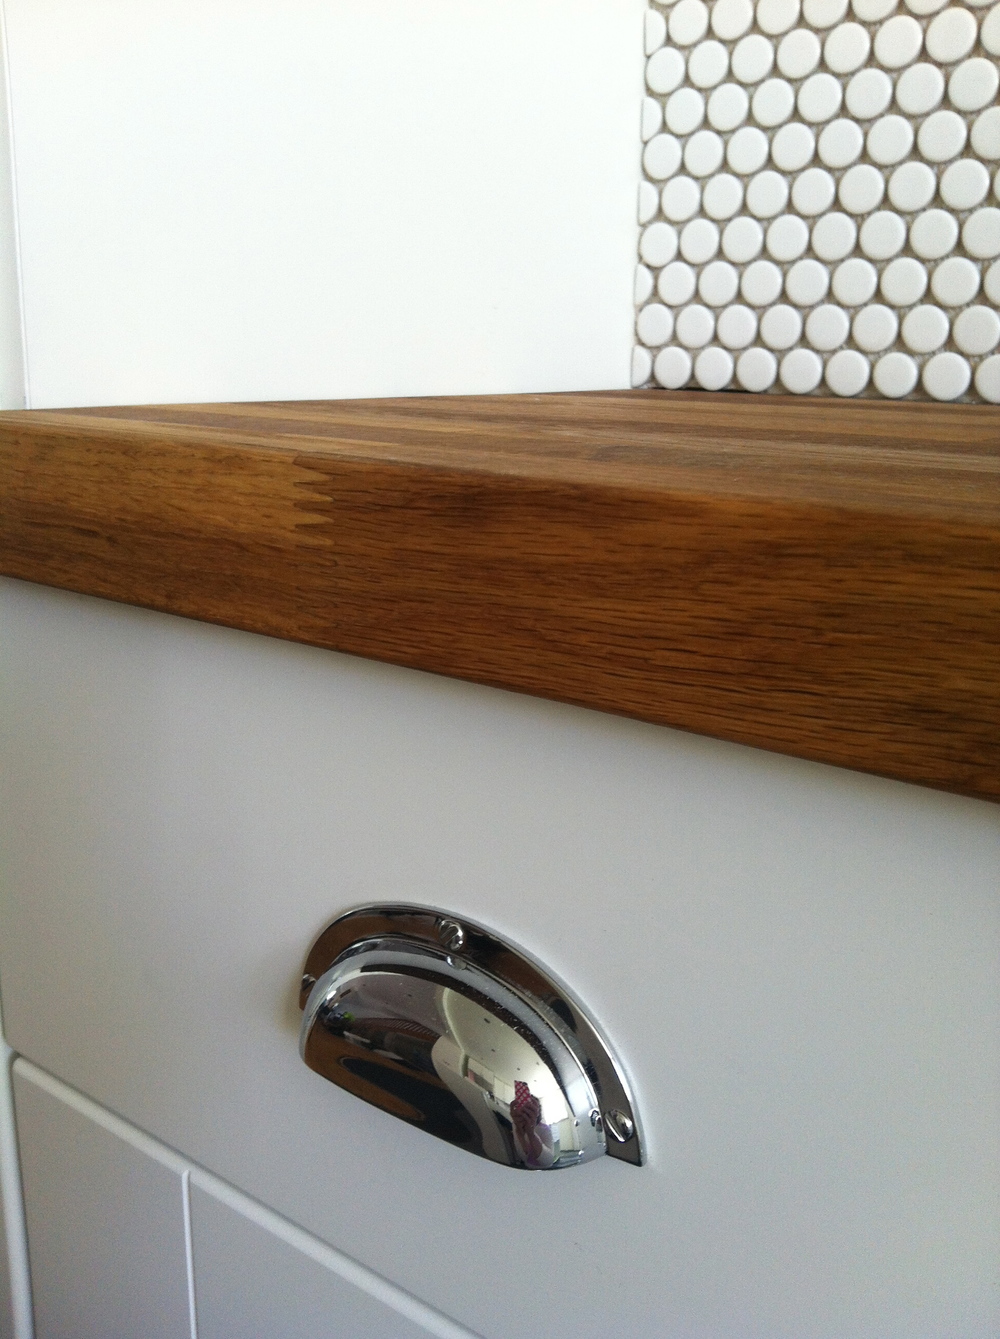
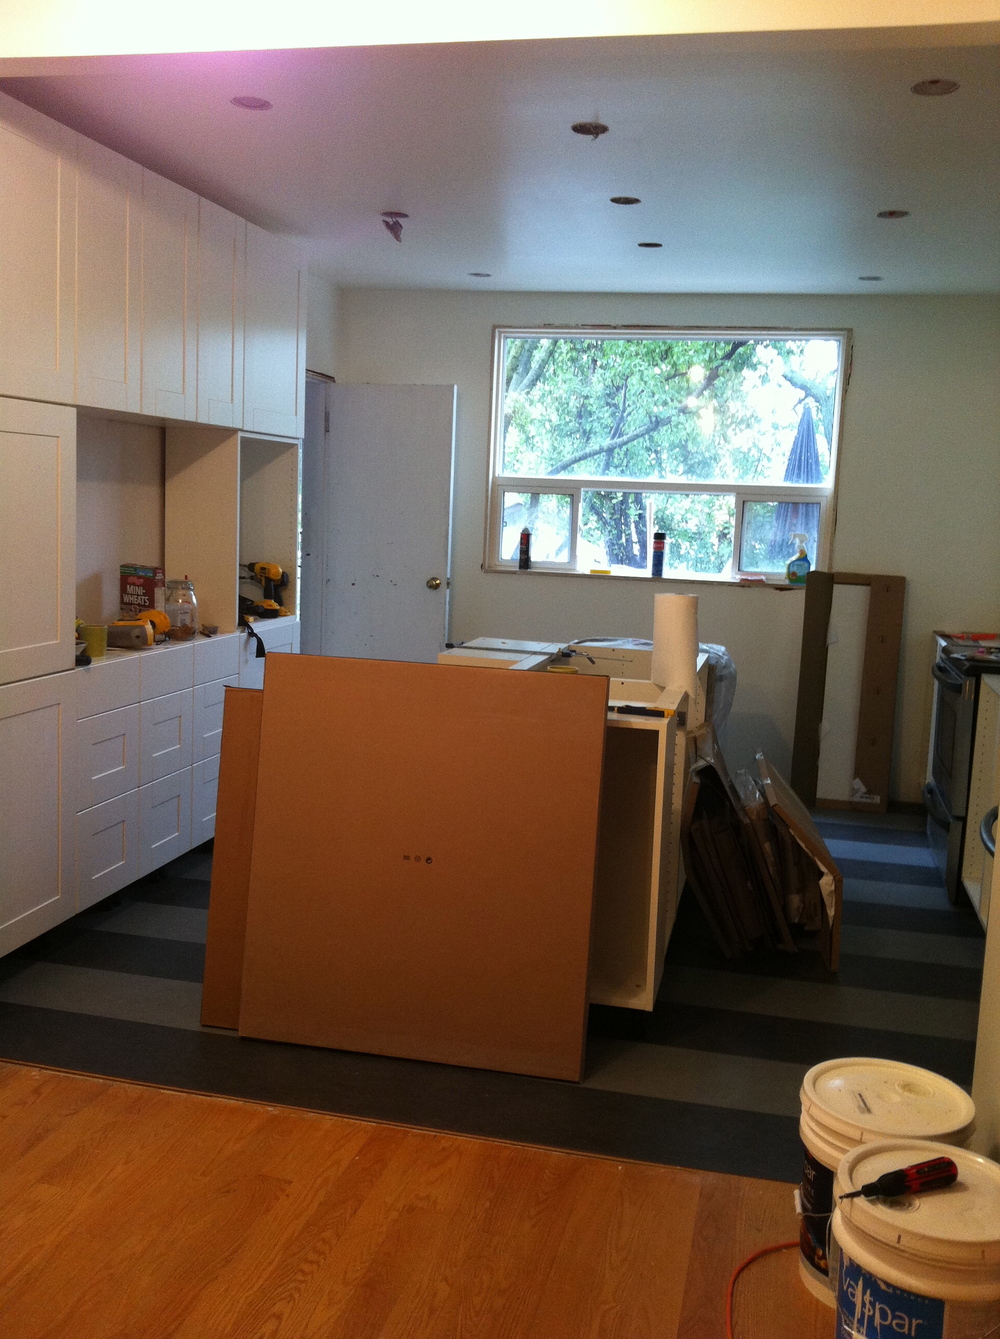
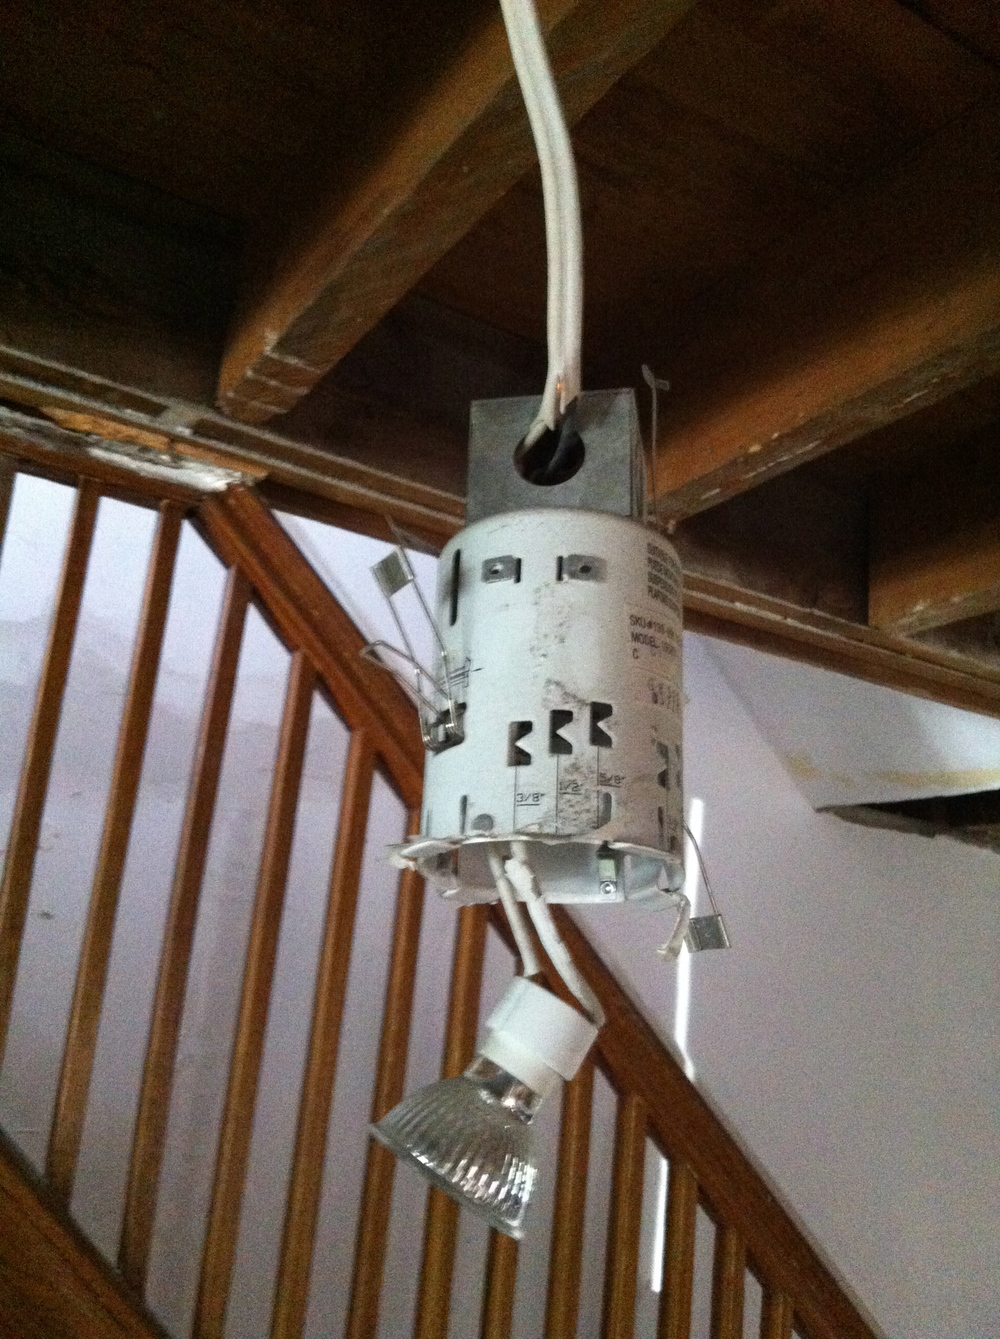
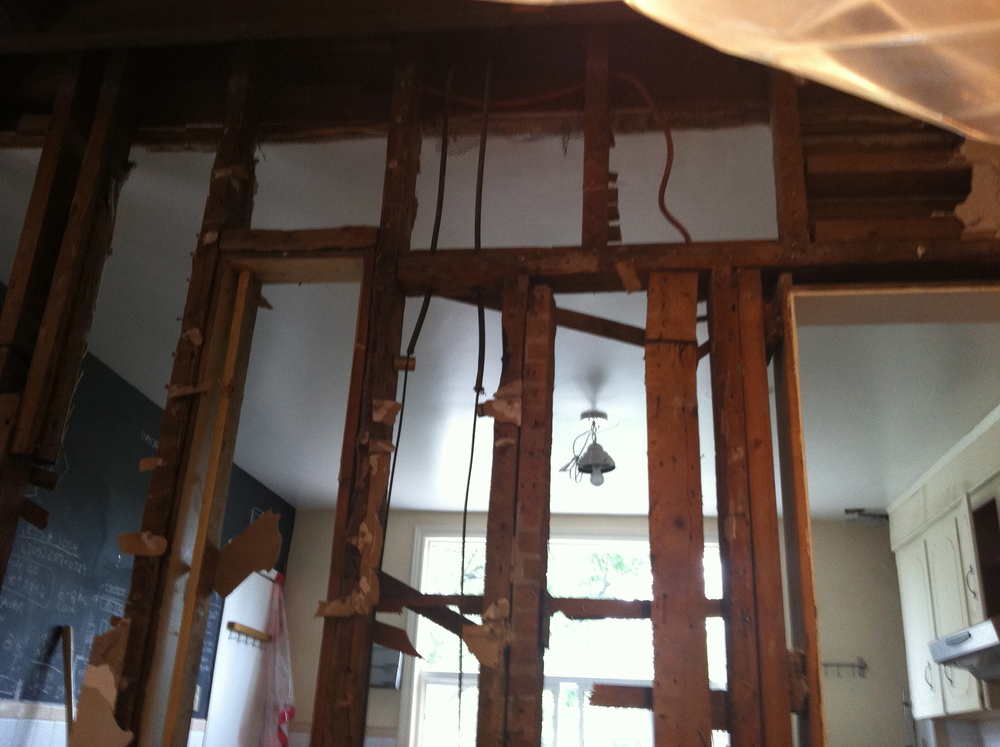
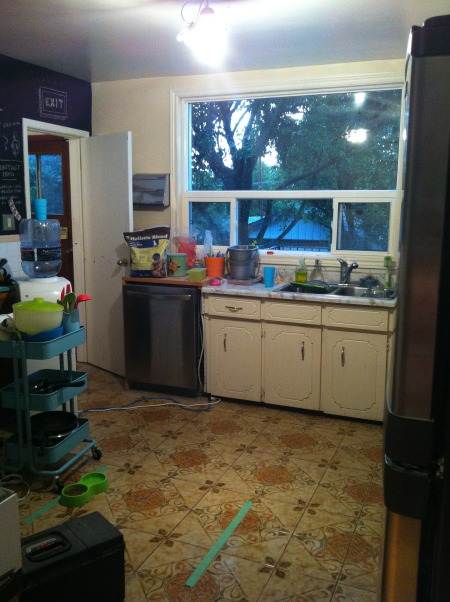
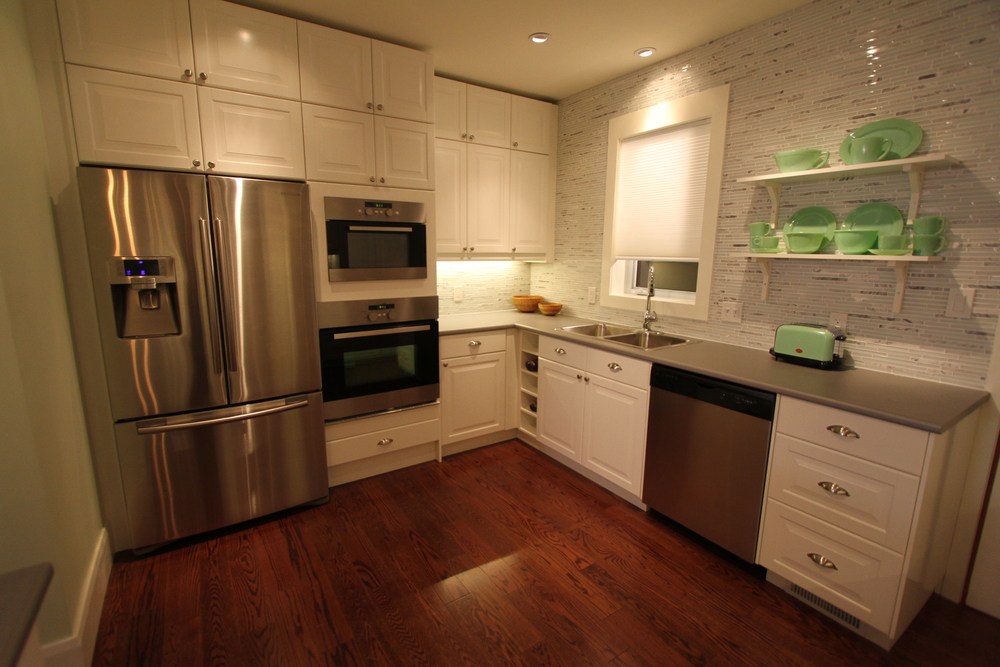
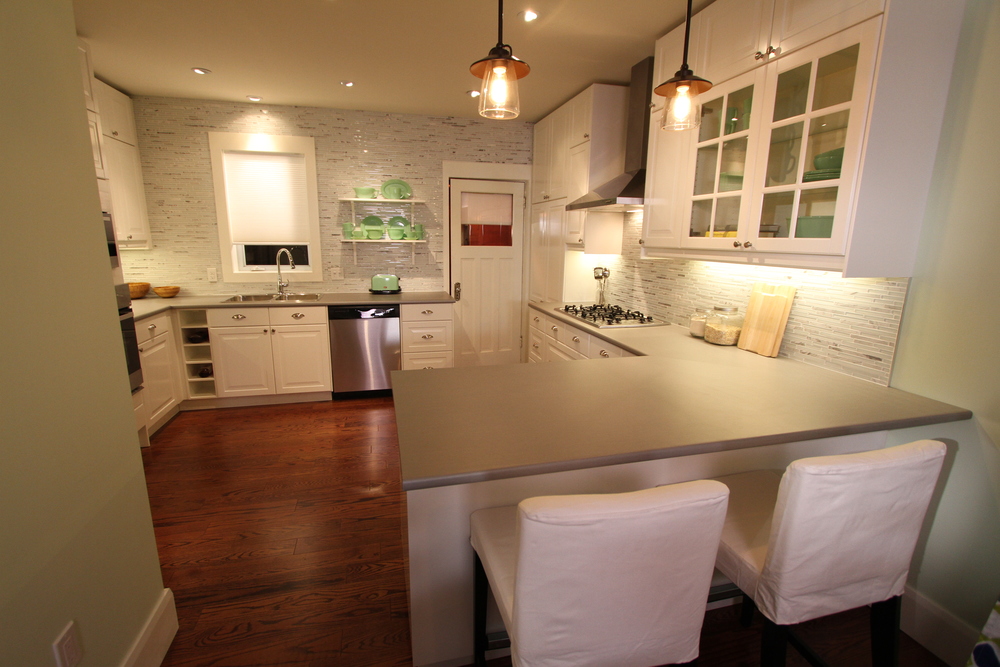
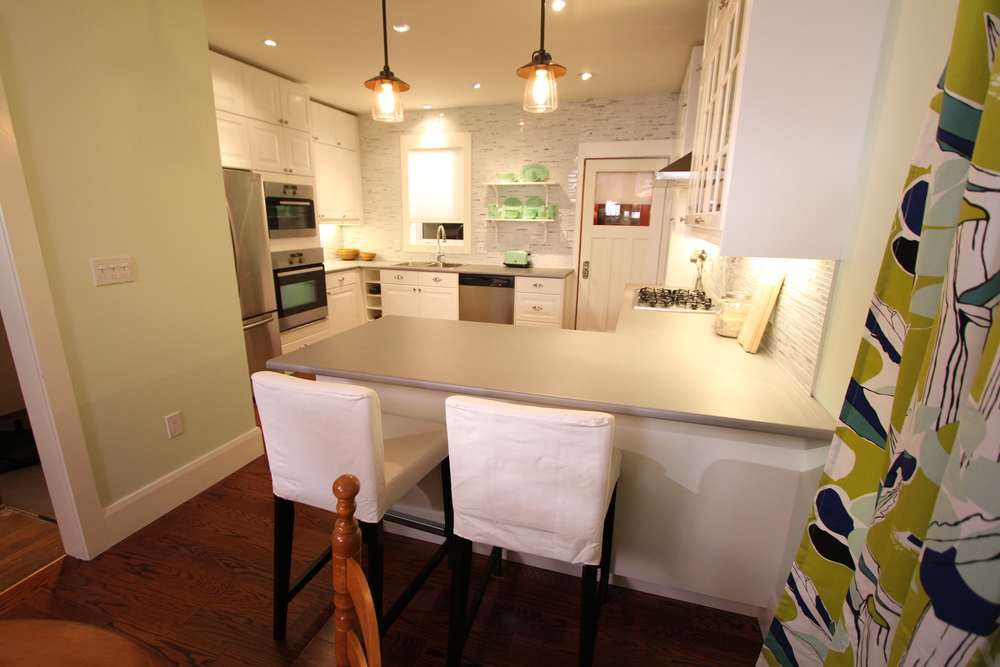
Walls came down and opened up the whole main floor.   The open kitchen has loads more storage and the island in a dark grey adds another layer of colour.   These bar stools were a great budget-friendly purchase that the client found online - they can easily be spray painted to change up the look.    

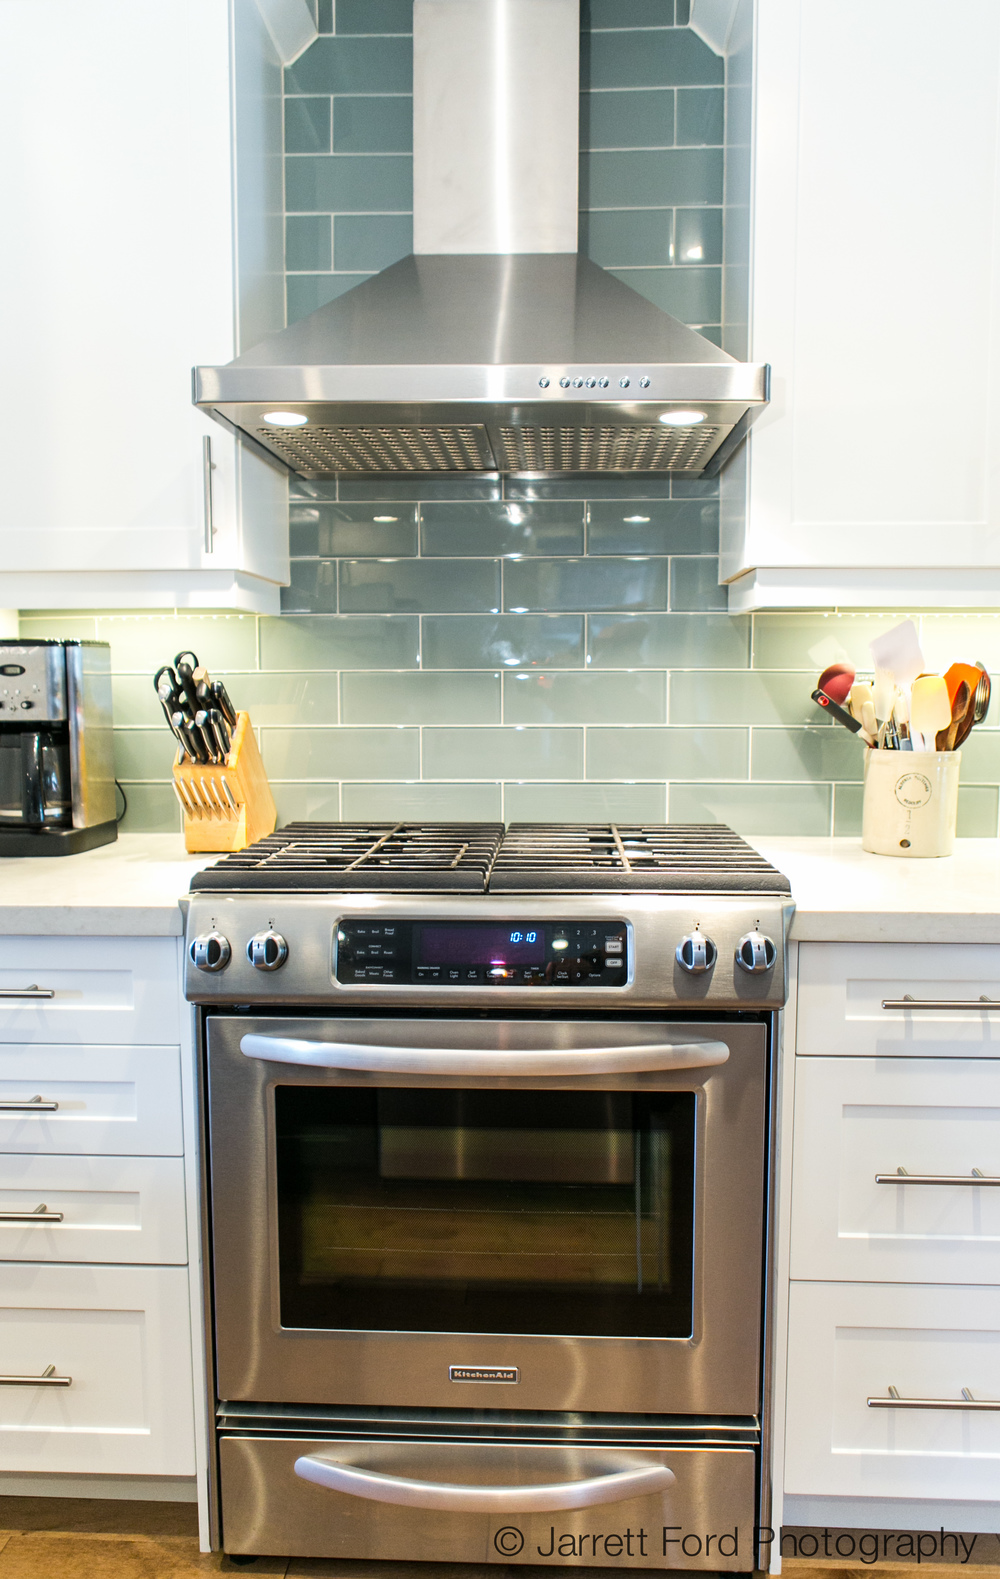
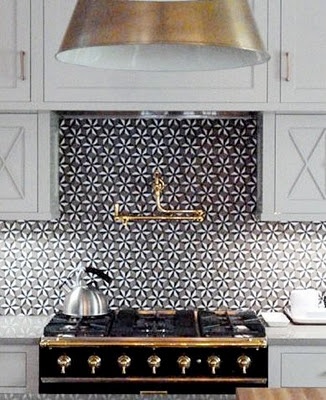
The glass backsplash adds a hit of colour and the gloss finish reflects the surrounding potlights beautifully.

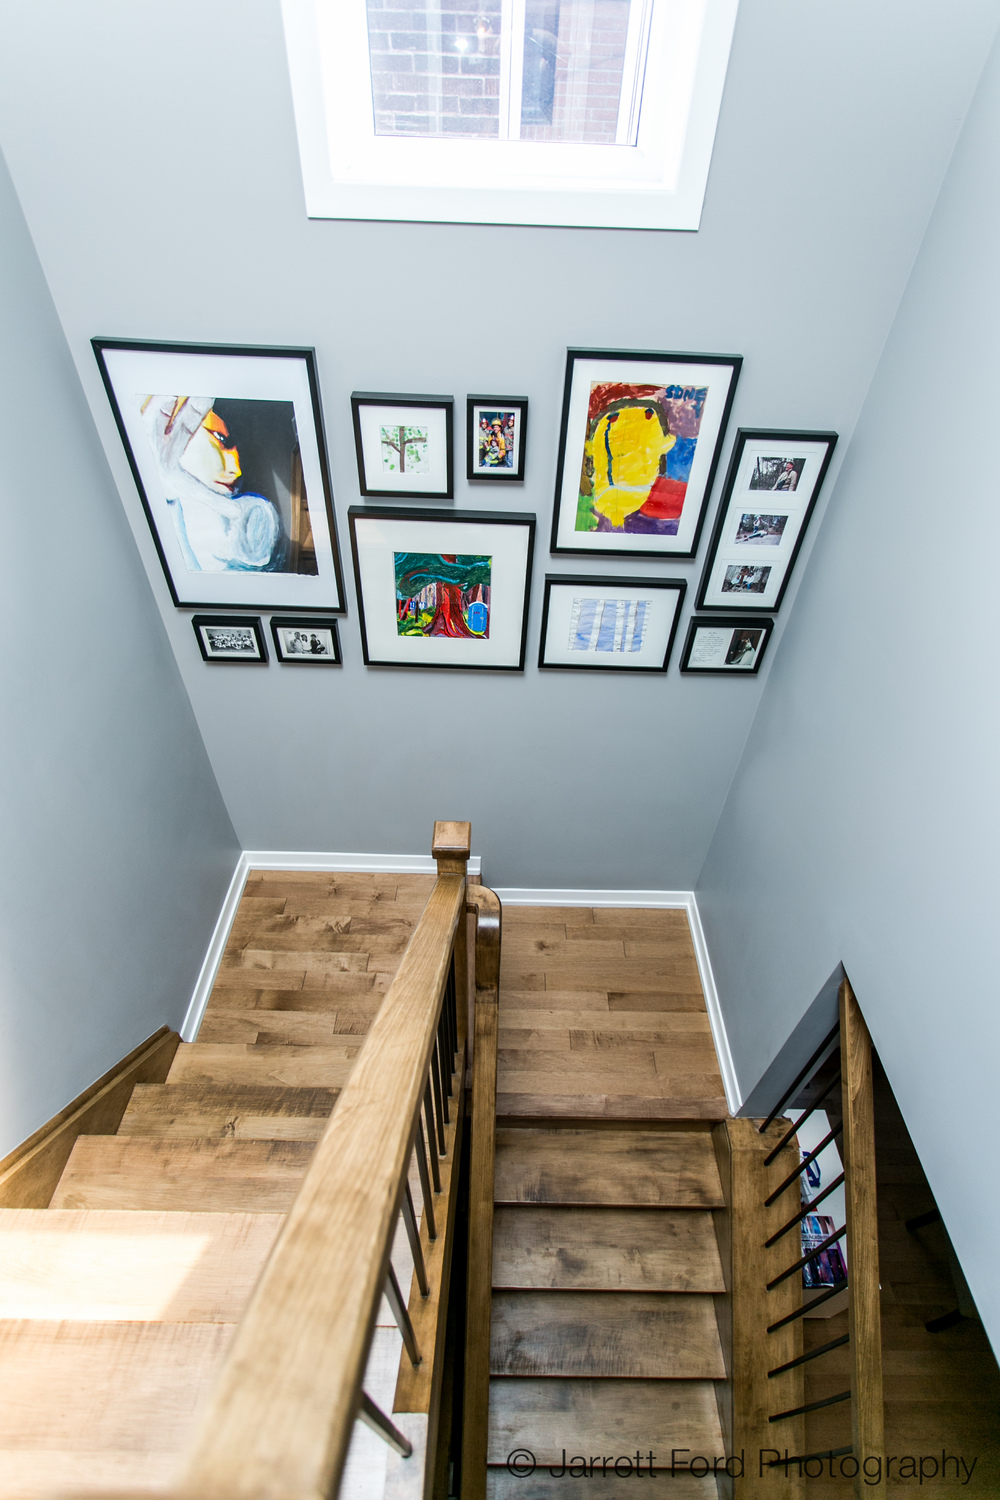
 The soft grey paint that we used throughout the house is the perfect backdrop for displaying the children's artwork.  The almost rustic looking flooring throughout the house is a mid-tone brown that hides wear and tear perfectly.


The new Ensuite bathroom had to be squeezed in, as to allow for closet space.  Therefore, the client found the perfect space-saving vanity that set the contemporary tone for the rest of the bathroom.   

It was important to maximize the floor space, so we installed a rectangular drain along the wall and had a curbless shower intalled using the same floor tile as the rest of the bathroom.  The shower door is a fixed panel that helps keep the feeling open.  

Smaller mosaic accents in the shower and behind the vanity elevate the finishes giving the Ensuite a real custom feeling.


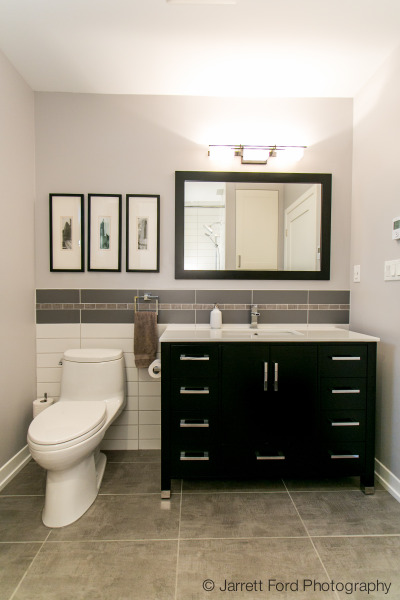
With four children, the family bathroom had to be hard-wearing and functional.   Each child has their own storage in the vanity and a hook for their own towel.  Anyone with children knows how important ownership can be and this bathroom gives each child their own space. 

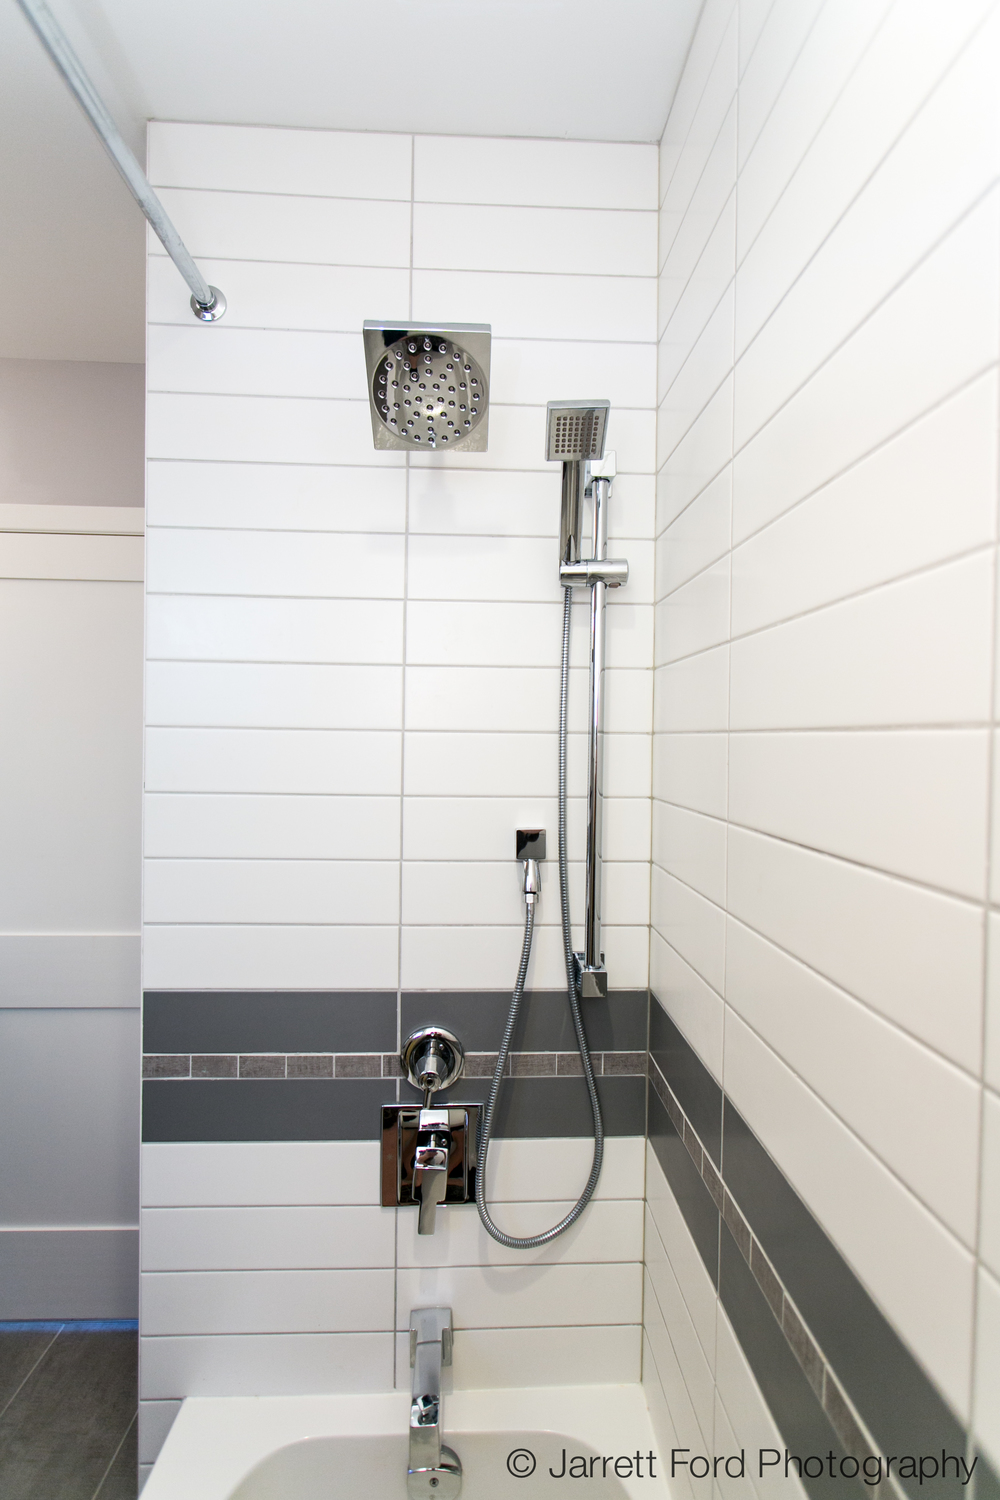
The accent stripe in the shower and on the vanity wall adds interest and a hit of pattern to liven things up.

In the end, the client will be able to enjoy this functional, modern and stylish home for years to come.  The house has been given a new lease on life that will adapt to the client's changing needs as their children grow older.  Rather than start from scratch, they were able to create an updated, more functional home that they love from what they had with help from the following team:

Architect: Hudson Architecture

Builder: Alan Heron Homes

Interior Design: Rebecca Purdy Design

Kitchen: Aya Kitchens & Bath


The renovation fizzle is in effect.

You know what I'm talking about...the hype of the renovation has died down, things are functioning so the pressure is off, everything left to do you can live with undone.   I am officially down in the dumps about my house again.  And yes, this is normal.  I say it to everyone else and I know it is part of the process, but it still sucks.

We are all familiar with it, it doesn't just happen with renovations.  Life takes over, priorities change and we have to move on to the other facets of our wonderfully complex lives.  Next thing you know, you're living with windows and doors with spray foam hanging out all over the place for two years and you don't even notice it anymore.   And now you understand the multitude of candidates available for shows like "Disaster DIY" on HGTV.  It just happens.

But, I WILL NOT let this slump get the best of me!  Here is my cure - I am going to review the kitchens that inspired me to do this in the first place.   They won't look like my kitchen, but, they motivated me to get to it and I'm hoping they will again.   And I'm also hoping my husband and contractors have a look and feel inspired to wrap it up and make their work in my kitchen shine as well.    In fact, they are going to get a special e-mail with a link to this page just to help out.   They love it when I'm in this mode.  They call it nagging, but I call it getting s*&t done!

 Source: www.southernliving.com

Source: www.youpaidmorethanme.blogspot.com

Source: www.wherethesidewalkbegins.blogspot.com

Source: www.doyoulovewhereyoulive.com

Source: www.rebeccapurdy.com

Source: www.countryliving.com

Source: www.housetohome.co.uk

Hope you enjoyed some of my fave kitchens and cross your fingers that I'll have some of my own beautiful kitchen shots to share in the VERY near future.  Take care and connect soon!

So close, yet so far.

This is the part of a renovation that I love, but also hate.  It's almost finished and the basics are functioning, but, the little stuff takes the longest to do.   This finishing part is excruciating to me - I can see the final product, but the trim isn't finished, the plate covers have to go on, the wall needs patching, and so on.  It's the part with the least amount of impact, but most amount of work.  

It's where people start saying "we can live with that for awhile" and it never gets done - and running out of money starts to dictate the decisions.  This is definitely one downfall of the DIYer version of renovation.  It's also why were are leaving our hideous honey-coloured living room floors for another year.  Out of time, energy and money.  But, it's all about compromising without sacrificing your total vision entirely.  The floors can wait another year - I don't think they will mind.

But, here are the positive things.

I have grey grout!


When it first went on, I panicked.  I thought I had really screwed up.  I usually experiment at my house, so clients don't do the suffering and was sure this was an experiment that failed.   It didn't help that everyone that looked at it said it screwed up their eyes and reminded them of that computer-generated artwork where you had to go cross-eyed to see the image!  However, with a little elbow grease I worked the grout back a little and am now thrilled with the result.  If you stare too long, things still go wonky, but that will stop once I have kitchen things in front of it, and then it will sing!

And my countertop is installed!  Look at it in all it's simple off-white-with-a-touch-of-sparkle glory (not to mention the amazing shadows at dinner time):

Thank you again John from Beyond Tile & Stone for this one!

And a special thank you to Kevin from TMK Mechanical for doing all of the plumbing!  You may have noticed my faucet and soap dispenser also installed.   I have water - the best news for days!

And my lights, my wonderful lights.  They are nothing you haven't seen, but, I love the impact of them all together over the island.   And Paul (my electrician) was wrong - they aren't too big for the island and I don't care what he says about it.  You definitely couldn't ask for a more honest electrcian at RK Electric.

But you were defintely right about my hall lights - I don't need the cork insert for waterproofing because I'm inside.  You can keep making fun of me for that.  Until you see how great it's all going to look pulled together.   

Here's Paul's response when I asked him how much longer he'd be working at my house (this is the polite version of the photo - the other one involved a middle finger!)

And my oven hood is up! But, the old stove is in (I guess it's not THAT bad...)

Well, I think that's it for now.  We are going to start pulling it together soon and I've started unpacking my stuff. I'm not going to show final photos until I have "propped" it all.   I thought: "Hey, I prop rooms for everyone else, why not do it for myself?" So that's what I'll do.  I'm pretty sure I won't start crying when I walk in for the final reveal though, but who knows?  I am known to cry easily (What? Some commercials are REALLY moving). Take care for now and next post, there will be some real beauty shots!

I'm not the one who needs the straight jacket!

I think it's all of the wonderful people I have been working with on this kitchen (now main floor, stairs and hallway) reno.   I'm sure I've been driving them all nuts with my indecision, plan changing, generally neurotic tendencies and they will be in need of the padded walls and straight jacket.  Here are my guys Todd, Dave, Josh and Scott - you may have also seen them on Leave it to Bryan. They are contractor superstars! 

Funny, it's SOOOO much harder to design your own space.  I think it might be a case of knowing too much about all of the amazing products out there and having a hard time choosing one?  Who knows...I just know I'm so much better with someone other than myself as a client!  But, you'll be relieved to know I have made a lot of final decisions and they are all getting installed as I write.

For example, I've picked my floor.   I went with Marmoleum Click in 1' x 3' sheets from E-Floor in a black and grey stripe pattern.  My husband installed it and we are thrilled with the results.  


It didn't start out well - after four sheets and about a thousand cuss words he smashed his thumb.  It ended up swelling so much he had to go to the hospital and have the nail pierced and the blood drained.  Important thing to remember from this: Nails don't feel pain, so it's not nearly as bad as it sounds!  I must add that I was a great supportive help through the whole thing - I kept reminding him that there were children on either side of our house, not to mention our own, and dropping the F-bomb as often as he did was TOTALLY inappropriate.  For those of you who know me, you are probably thinking I will be struck by lightening for saying this.  Might I remind you - I am very aware of the right time and place for swearing (mostly!).

We've also got a backsplash that's up, just not grouted.  It will be soon though - right Todd?  I'd also like to say a a special thank you to John at Beyond Tile & Stone who has been driven particularly nuts by me, but hasn't said a word about it (at least to me).  Such restraint!  And so helpful!


And hardware - done!  Went with two types from Lee Valley Tools and you couldn't beat the price.  I know it's great to splurge on hardware, but, I think this stuff just looks like I splurged.

And fabric for the roman blind - I received it today!  Here's a sneak peak before it's made:


And lights...I'll wait to show you those in the big reveal.  Some of them won't make sense until you see it all pulled together.  My electrician Paul from RK Electric is questioning my design ability after seeing one of my choices, but, that's okay.  I'm used to being second guessed, and he usually comes around after it's all installed. He also deserves a huge thank you after re-wiring almost my entire house unexpectedly.  Who knew knob and tube would be rampant throughout my house?  Well, I did, but was hoping for the best.  

That's it for now.  Can't wait to share the final reveal with you.  It won't be long now.  Floor, cabinets, some counter and backsplash installed, it's only a matter of days now.   So grateful for my new kitchen and all the people that helped make it happen.  But, the biggest thank you goes to my husband.   We couldn't have done it without all of your hard work, injury and swearing! 


We're getting there...

At least that's what I keep telling myself.  We've had a mild case of the "project creep" around here.  Actually, I haven't, but my husband sure has.  All of a sudden we "need" to take down all of the plaster and lathe so we can insulate the exterior walls.  Sure, it is economical in the long run, but, my countertop budget is getting smaller! We don't freeze in the Winter, it's just a little chilly.  And we are replacing the windows next year.  I didn't see the big deal - put on a sweater! Plus, all of this happened while I was keeping the kids away up North.  And how convenient that I couldn't get in touch with my husband until it had already happened.  That's what I get for leaving my husband and my electriciam alone - now they are in cahoots!

But, the good news...My stairs are supported!  The supporting wall is a little bigger than I had wanted, but, I removed an 18" base cabinet from the island and now it all works. 

See that...new drywall EVERYWHERE.

And look at how amazing the sun is coming through the kitchen window.  It will be so nice to have that spilling into the entire main floor with that wall removed. 

 And finally...my inspiration page.   If you check out my Pinterest page, you may have seen some of these images.  But, for those of you who don't (and I honestly think you should!) here you go:

Anyway, the end is getting so near and I'm so excited to share it with you.   In the meantime, I'm questioning my sanity.  For someone who loves colour as much as I do, I can't believe I have just decided to paint white.  It's the first time in my entire life and I'm feeling a little nervous.  White cabinets, white backsplash, white walls - maybe all that's left are padded walls and a straight jacket?  We'll know soon enough....

It ain't a reno if it ain't got that porn...

Wow! Living in the house while renovating really sucks.  Not just because of all of the hideous dust, but I can look at all of the frightening issues all of the time.   This post is just going to be highlighting the horrible things people do to houses.

Tying in knob and tube to ANYTHING is wrong:


Letting your stairs float from the second floor to the main floor.  As a general rule in houses: Most things, especially stairs, need structural support.  I'm not sure why this one seems to be forgotten so often.  The entire weight of my stairs is being supported by the stringer, and not tied into much else.  Take a look:


And most recently, someone (not us, I assure you!) installed potlights the WRONG way. I don't know all of the technical terminology for this, but there is supposed to be a plastic ring that protects the wire where it goes into the fixture (heaven knows I heard this spoken about enough, right Bryan?).  Here is what you shouldn't do:

And here is my favourite:

This is not a load-bearing wall.  However, it doesn't mean you should take any scrap of wood lying around and stick them together and call it a wall.  This is pure craziness.   This wall is why I need to apologize to my husband - Christopher, I am sorry for all of those times I nagged and criticized you for not being able to find a stud.  I take back any nasty comment about the number of holes you put in the wall trying to hang anything up.  Now I understand why and I am sorry I ever thought it was you (at least for most circumstances). 

And last but not least, it is great what you can find buried in old walls.  We found these stashed in the joist bay of the basement:

I'm hoping the birthday card from "Mom" that accompanied it came from a different present and just got caught up in the stash.  It would be kind of odd if this person's Mom was giving him porn for his birthday, wouldn't it?

All this to say, this is definitely not the worst house I've seen, which is slightly comforting.  Keep in mind the houses I have seen have had to be bad enough to make it onto television so they were pretty bad.  So really, maybe mine is horrible and I'm just de-sensitized?  I'm going to go with not that bad and trust what my wonderful contractors Todd and Scott are saying. 

Tune in next time to hear what Paul, my electrician, has to say.  And I promise to start posting some pretty pictures.  I'll make next post my "Inspiration" post.  Until then, take care!

My Kitchen is a Dump (But not for long!)

Hear ye! Hear ye!  The renovation of my very own kitchen has begun.  That may not be exciting news to you, but I've been waiting four years for this.   My kitchen has been an embarrassment to me as an Interior Designer. Not that I picked the hideous tiles circa 1978 or the peach-flecked wall tiles that don't even match (not that matching the floor would have made things better).  Here, have a look for yourself:                                              (Obviously a little messier than normal - hey! We're renovating...)                         

Anyway, we were all ready to start gutting it and discovered asbestos around the ductwork in the wall we are removing.  If it's going to stay in your wall, it's not such a big deal but exposing it to the house (and the kids) was the big concern.  Therefore, we did the job properly and called in the experts to test it, as well as the plaster.  We have a pretty old house, so anything is possible.  

Fortunately, we just had to have an abatement (proper removal of hazardous materials) .  I use the word "just" lightly because having a mold or asbestos abatement can be intrusive and very costly.   For example, I asked how much it would have cost if we had found asbestos in the plaster and I was told anywhere between $20,000-$30,000 to remove everything.                                                                                                                           (Where the duct was removed - take note of the craftmanship of the stud; not good foreshadowing for the rest of the renovation)

On that note, thanks a bunch Tara from Environmental Services Group and Mark from Kryztiuk Contracting Inc. for your help in managing our asbestos issue.  I will sleep easier knowing we did it properly. This may not be the exciting part, but, it is definitely a part I enjoy - knowing we are taking care of things and making our house safe again for ourselves and most importantly our children.   

The fun part is almost here.  I can't wait to show you the floors I have chosen (Marmoleum), the countertops (Butcher block AND Quartz), the cabinets (Ikea, Adel - yes, I really do love Ikea cabinets and you can't beat the price!) and the penny round backsplash.  

I will share all of my excitement, trials and tribulations.  I might even tell you about some of the arguments I have with my husband. Like the one today when I asked him not to demolish the floors just yet because it takes longer than the 2 hours we had to remove 4 layers of flooring and concrete.   Plus, who wants a two and a five-year old running around in that sort of mess?  He eventually relented and saw my point.  And if you are thinking "happy wife, happy life" please spare me and keep it to yourself.  I hate that expression (even if there is a slight possibility it is true!).                                                                                                                                           (Does this LOOK like an easy floor to remove?  I didn't think so.  I love you Christopher xo)

I could go on and on, and I probably will, so check back regularly to see how it goes.  Take care!

Kitchen Favourite - Part I


This was one of the many kitchens featured on "Leave it to Bryan" on HGTV.  But, it was one of my favourites and I'm sure it had a lot to do with the amazing homeowners we were working with.   They were a lot of fun and intended to maximize the experience of being on a television show.  And they did it really well - rolled with the punches, handed over control, made quick decisions and stayed positive through the whole thing (even in the face of not getting everything they wanted!)   


We used Ikea cabinets in the Lidingo white.  Due to the ceiling height I was able to  add an extra row of cabinetry to the top using a combination of fan cabinets and additional fridge cabinets, depending on the depth needed.  In the corner near the back door, we couldn't use regular counter-depth cabinets, so I stacked upper cabinets to match the height I wanted without impeding access to the back.  I'm so jealous of the amount of storage they have!


Which brings me to the other reason it was a favourite kitchen - I was living vicariously through them.  My kitchen is a dump (no word of a lie) and I got to pretend it was mine for a day - I even used some of my own stuff staging it (sorry guys for taking some of it away after!)  Anyway, mine will get done in August, even if I rip it out with my own bare hands, so I will be sure to post pictures of the progress and final "reveal".  In the meantime, I hope you enjoy looking at this kitchen as much as I enjoyed creating it.  And thank you Emma and Scott for your amazing testimonial!


Rant: Criteria for a non-functional kitchen?

Since when is a kitchen not functional because you can't open all of the appliances at once?   Who does this?   Is it really necessary to have the fridge, oven and dishwasher open all at the same time?  Call me crazy, but I think this would be non-functional even in a big kitchen!  On two separate home shows recently, I have heard homeowners criticize a kitchen because things would be tight if you had all of the appliances open at once.   Seriously?  How often are you loading or unloading a dishwasher, basting a turkey and putting leftovers in the fridge all at once?  Even two people in the kitchen wouldn't be doing all of this at one time.  And if you are, you shouldn't be!  It's dangerous!  Call it small, call it ugly, say the layout sucks, but, not having everything open at once doesn't make it non-functional.   I agree this rant may seem trivial, but I just couldn't resist commenting on the ridiculousness of this concept.  Thanks for listening!