Hear ye! Hear ye! The renovation of my very own kitchen has begun. That may not be exciting news to you, but I've been waiting four years for this. My kitchen has been an embarrassment to me as an Interior Designer. Not that I picked the hideous tiles circa 1978 or the peach-flecked wall tiles that don't even match (not that matching the floor would have made things better). Here, have a look for yourself: 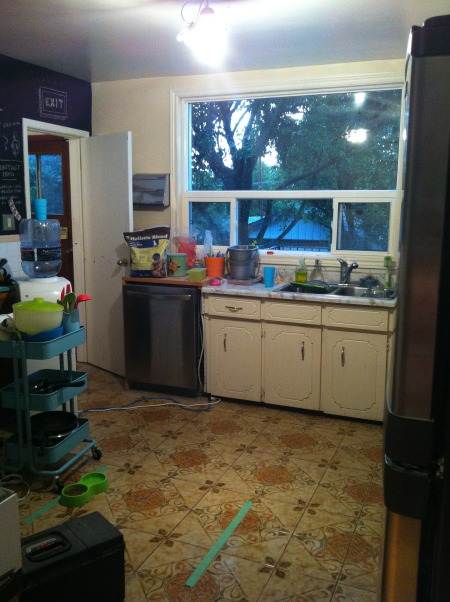 (Obviously a little messier than normal - hey! We're renovating...)
Anyway, we were all ready to start gutting it and discovered asbestos around the ductwork in the wall we are removing. If it's going to stay in your wall, it's not such a big deal but exposing it to the house (and the kids) was the big concern. Therefore, we did the job properly and called in the experts to test it, as well as the plaster. We have a pretty old house, so anything is possible.
Fortunately, we just had to have an abatement (proper removal of hazardous materials) . I use the word "just" lightly because having a mold or asbestos abatement can be intrusive and very costly. For example, I asked how much it would have cost if we had found asbestos in the plaster and I was told anywhere between $20,000-$30,000 to remove everything. 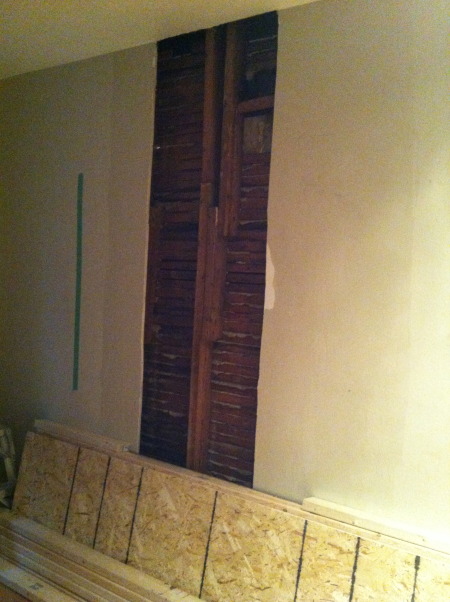 (Where the duct was removed - take note of the craftmanship of the stud; not good foreshadowing for the rest of the renovation)
On that note, thanks a bunch Tara from Environmental Services Group and Mark from Kryztiuk Contracting Inc. for your help in managing our asbestos issue. I will sleep easier knowing we did it properly. This may not be the exciting part, but, it is definitely a part I enjoy - knowing we are taking care of things and making our house safe again for ourselves and most importantly our children.
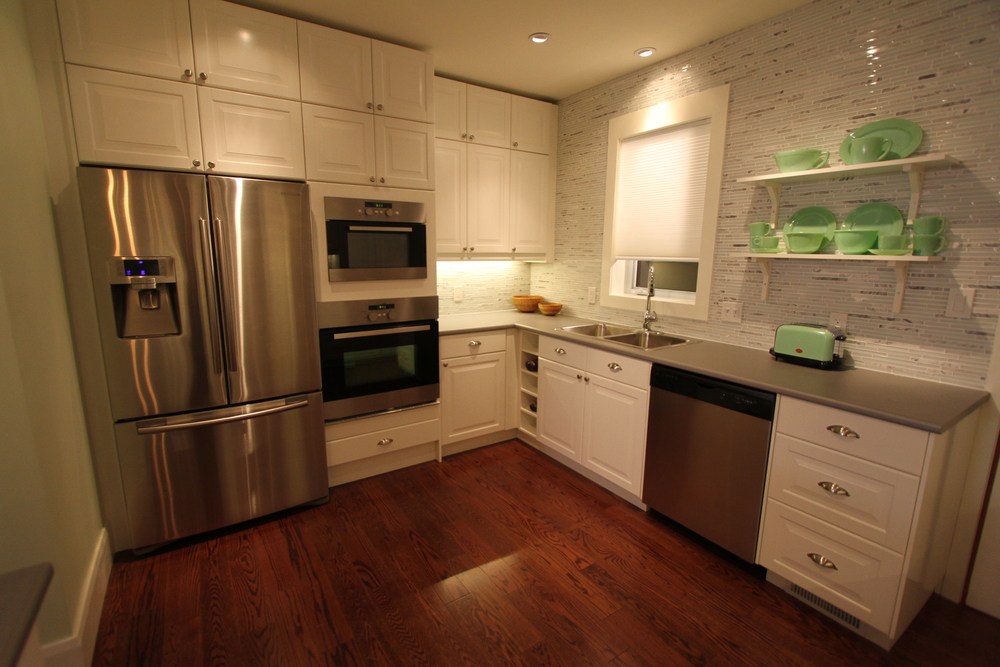
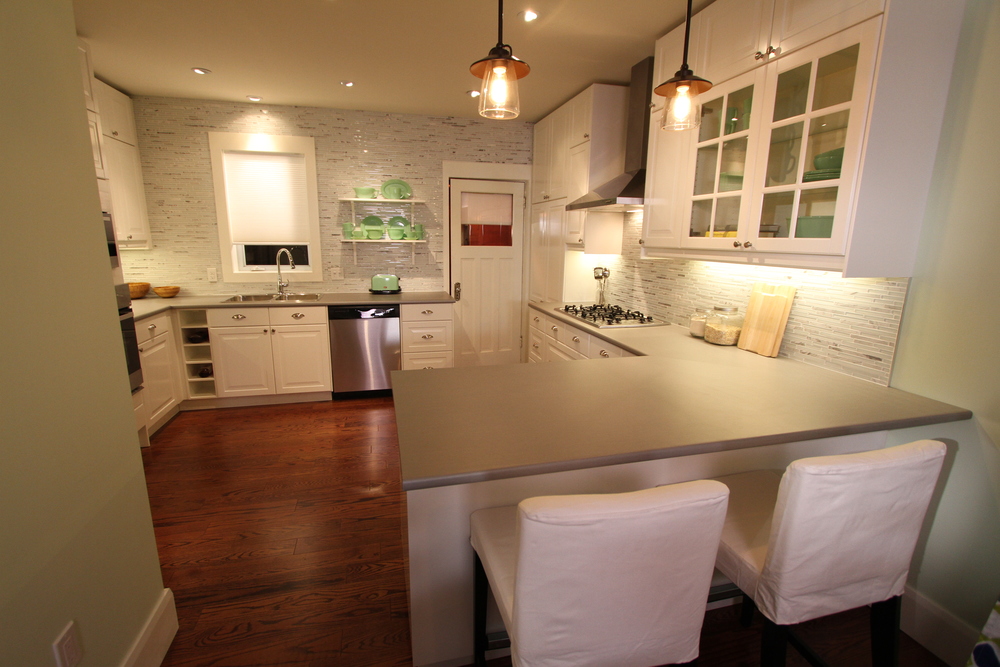
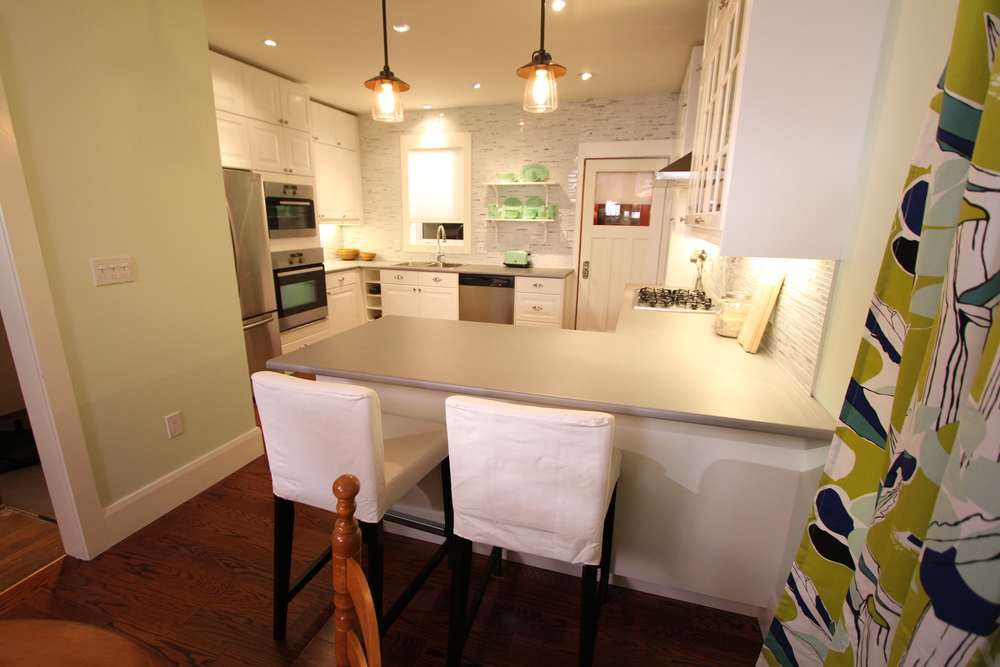
The fun part is almost here. I can't wait to show you the floors I have chosen (Marmoleum), the countertops (Butcher block AND Quartz), the cabinets (Ikea, Adel - yes, I really do love Ikea cabinets and you can't beat the price!) and the penny round backsplash.
I will share all of my excitement, trials and tribulations. I might even tell you about some of the arguments I have with my husband. Like the one today when I asked him not to demolish the floors just yet because it takes longer than the 2 hours we had to remove 4 layers of flooring and concrete. Plus, who wants a two and a five-year old running around in that sort of mess? He eventually relented and saw my point. And if you are thinking "happy wife, happy life" please spare me and keep it to yourself. I hate that expression (even if there is a slight possibility it is true!).  (Does this LOOK like an easy floor to remove? I didn't think so. I love you Christopher xo)
I could go on and on, and I probably will, so check back regularly to see how it goes. Take care!