The most challenging bathroom design...(and not because of the clients!)

Bathrooms are pretty straight-forward as far as layout and planning.   Things tend to be in standard places because they work there - sometimes there isn't any point to re-inventing the wheel.  If it works it works. Recently on "Leave it to Bryan" I was faced with the most challenging bathroom yet and given the 4-week timeline the pressure to figure it all out was ON.

Here is a plan of the existing bathroom (smallest family bathroom I have ever seen!):

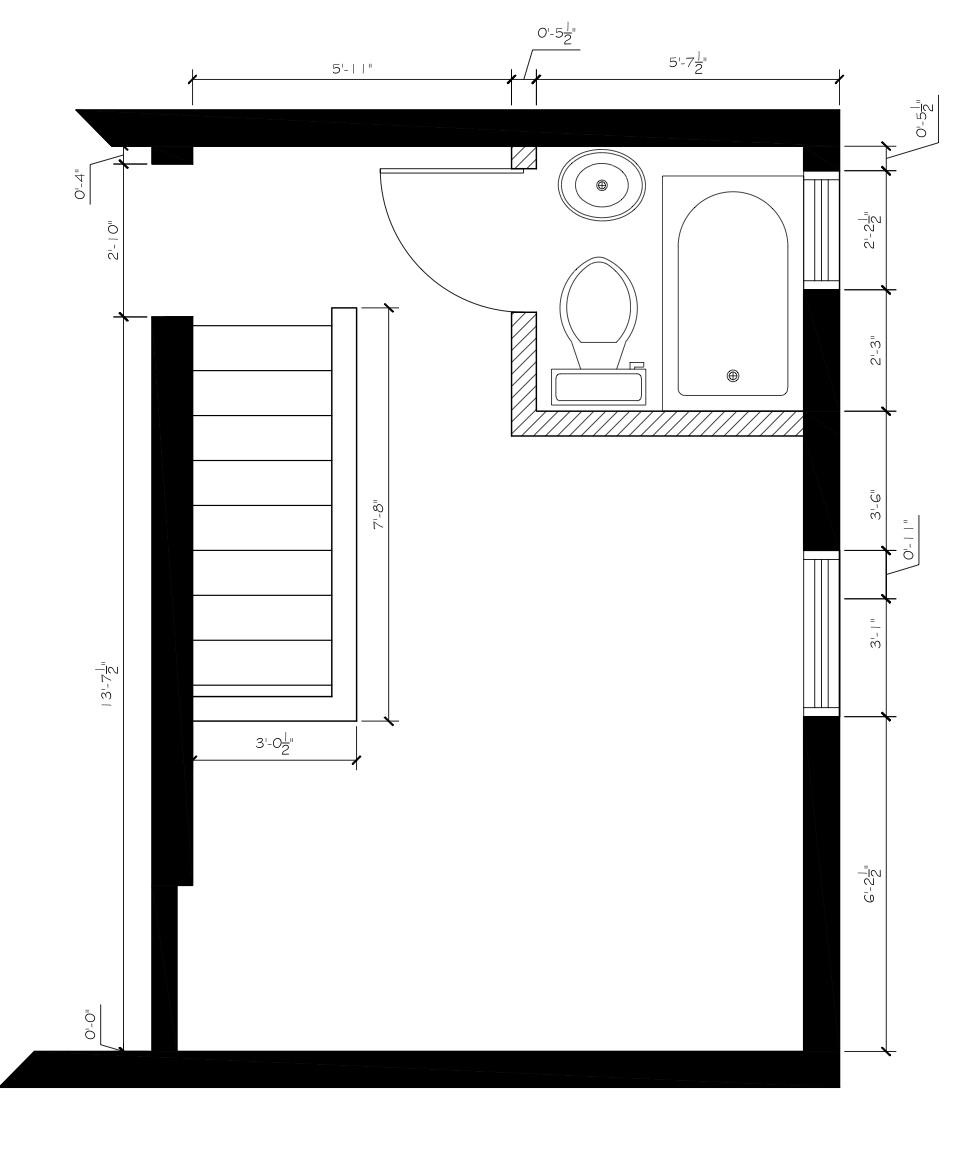
The challenge was incorporating a separate bath, shower, large vanity and storage in such a confined space that was limited by the stairs.   The only option was to go long and narrow.  Here is the plan I proposed:

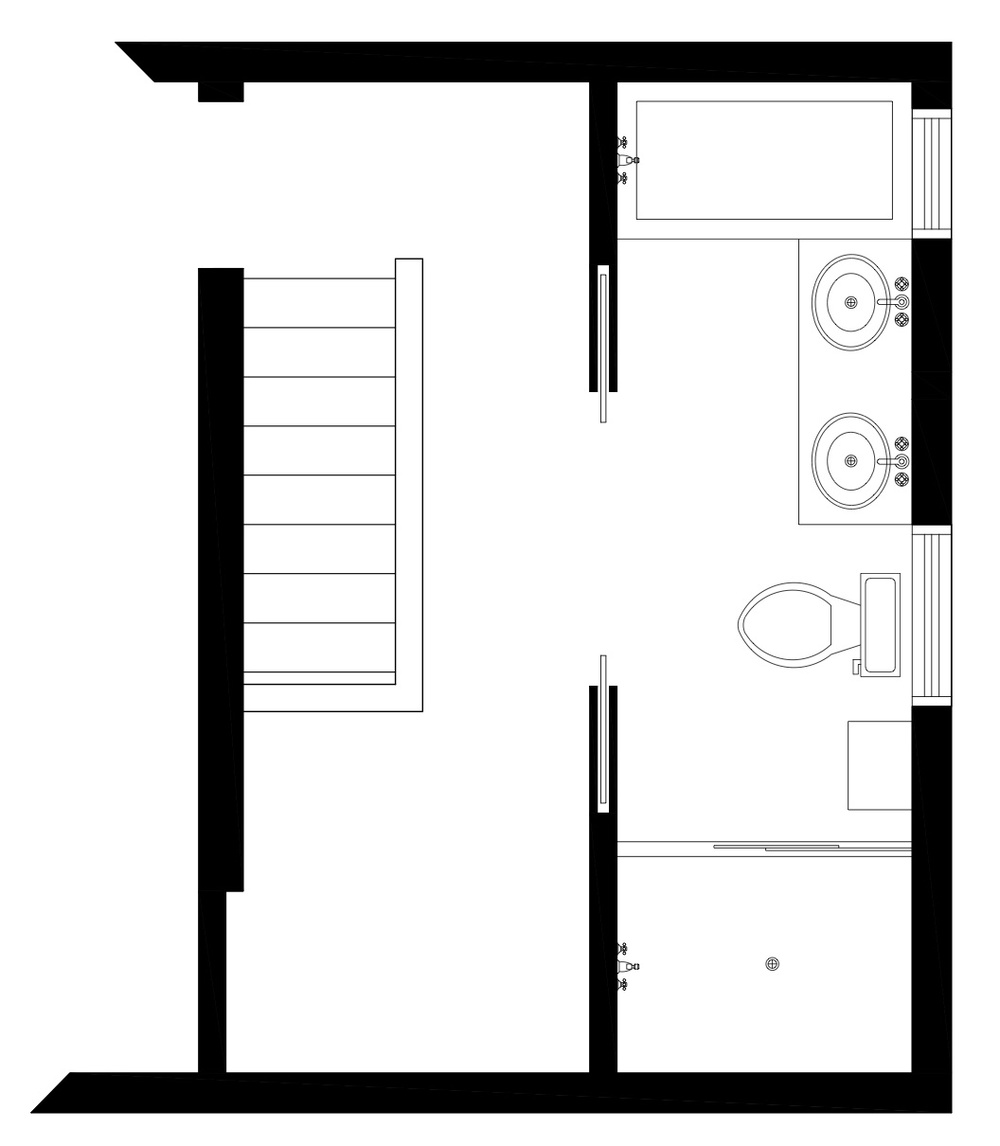
In order to combat the bowling alley feeling, or long corridor, I proposed dividing the bath and shower and putting double pocket doors right in the middle.  


The space is so long and narrow that it was impossible to take and overall picture of the space.   Therefore, have a look at the left side of the bathroom:
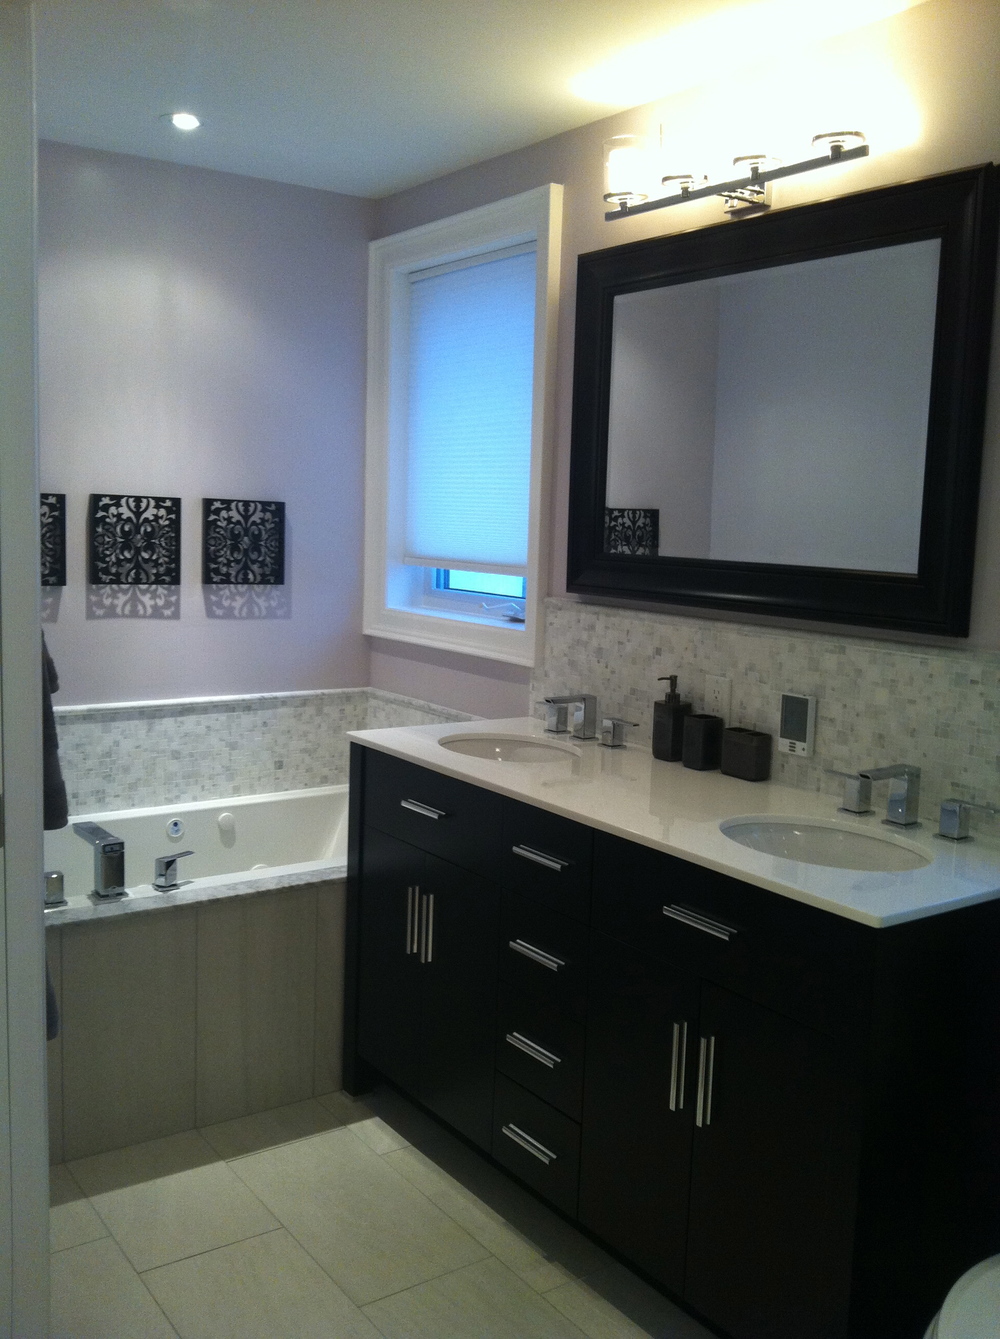
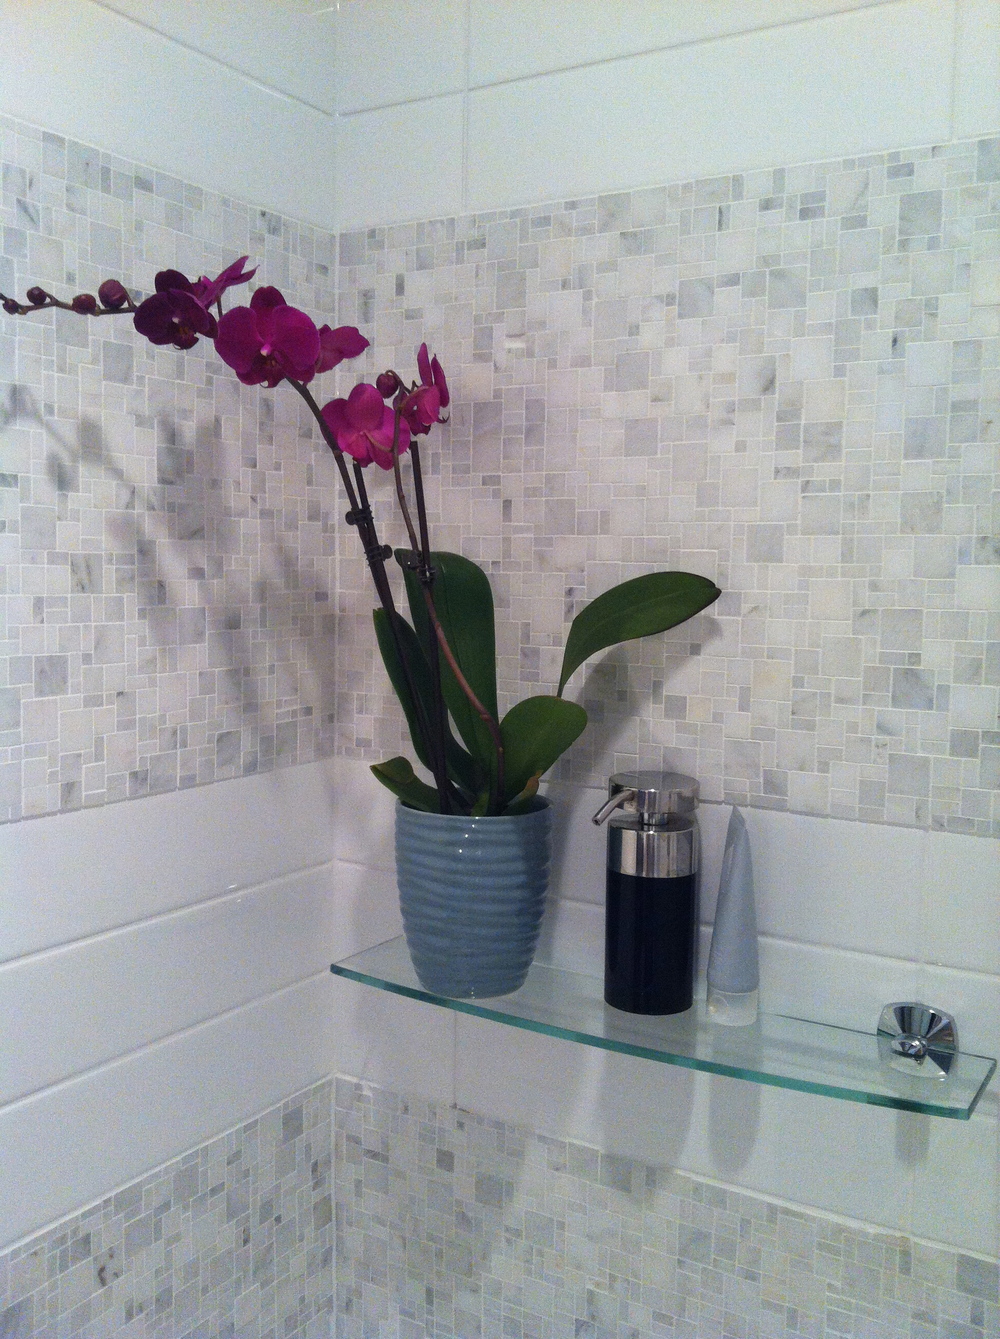
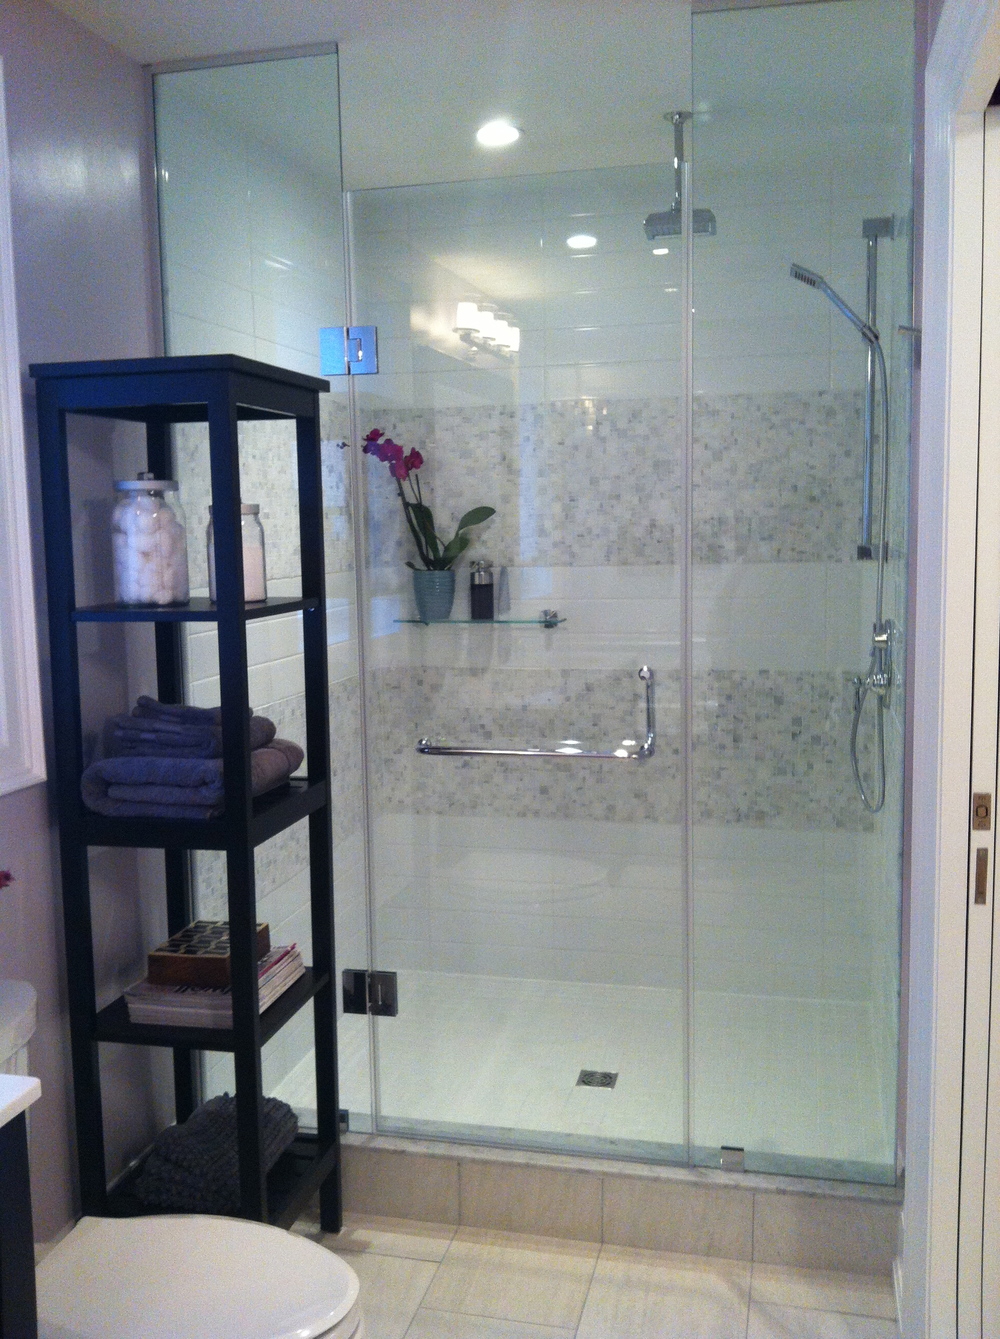
And now the right:

Another trick was to use frosted doors.  This isn't always ideal in a bathroom settting, but, they are right in front of the vanity so privacy wasn't as much of a concern. This allowed the light from the bathroom to spill out into the hallway.  In taking more space for the bathroom, we also stole the only other window from the adjoining laundry room and stairs, making it quite dark.  The frosted glass doors helped eliminate this problem.

The clients were hoping for marble throughout, however our budget (although healthy) did not allow for this once the structural issues and building costs were calculated.  Therefore, I suggested marble mosaic accents with an inexpensive tile for the main tile which is how the stripes in the shower came to be.  By using more stripes in the inexpensive tile we were able to save money and create a fabulous focal point.  It is definitely one of my favourite showers (plus I'm partial to stripes).

All in all, the homeowners were thrilled with the result and now have a bathroom fit for the whole family.   In fact, they wrote a wonderful testimonial for me when the job was done.   It's always nice to help great people get what they want in a renovation.   Thank you Ian and Jacqueline for being such great clients!  

Kitchen Favourite - Part I


This was one of the many kitchens featured on "Leave it to Bryan" on HGTV.  But, it was one of my favourites and I'm sure it had a lot to do with the amazing homeowners we were working with.   They were a lot of fun and intended to maximize the experience of being on a television show.  And they did it really well - rolled with the punches, handed over control, made quick decisions and stayed positive through the whole thing (even in the face of not getting everything they wanted!)   


We used Ikea cabinets in the Lidingo white.  Due to the ceiling height I was able to  add an extra row of cabinetry to the top using a combination of fan cabinets and additional fridge cabinets, depending on the depth needed.  In the corner near the back door, we couldn't use regular counter-depth cabinets, so I stacked upper cabinets to match the height I wanted without impeding access to the back.  I'm so jealous of the amount of storage they have!


Which brings me to the other reason it was a favourite kitchen - I was living vicariously through them.  My kitchen is a dump (no word of a lie) and I got to pretend it was mine for a day - I even used some of my own stuff staging it (sorry guys for taking some of it away after!)  Anyway, mine will get done in August, even if I rip it out with my own bare hands, so I will be sure to post pictures of the progress and final "reveal".  In the meantime, I hope you enjoy looking at this kitchen as much as I enjoyed creating it.  And thank you Emma and Scott for your amazing testimonial!


Leave it to Bryan - Season 2

Watch HGTV Canada tonight at 10pm for back to back episodes of the new season "Leave it to Bryan". It's been great making it (we're half way through) and we've had some amazing homeowners. How they are so trusting I'm not so sure? Although I trust Bryan completely would I be able to hand over a big chunk of money and let him go to town on my house without any control? I'm not so sure - it's a pretty brave move. Although the more I look at my kitchen floor tile (circa 1971), my caving in garage roof or my possibly leaky basement the more I think I would. Actually, let's get me on the show! I need some major work on my house - and yes, I might actually be able to hand over control to Bryan. As long as he promised no tumbled marble! It's not my thing...
Anyway, enjoy the show! I certainly will.

Dash of vintage...the perfect kitchen!

When I style a room for "Leave it to Bryan", this is my favourite part.  I also love picking the elements that make it a room like the tiles, cabinets, paint etc. but there is nothing like seeing it all come together for the reveal.   Each room is unique and fun to do, but, I especially love when I get to mix in some personal style and some of my own stuff.   We recently did a kitchen and I am still longing for it to be my own (yes, I'm waiting to do mine - it's hideous!).   You will have to wait to see the final kitchen when the shows start airing on HGTV Canada in the Fall, but I wanted to share some gems from the styling part. This photo is my own kitchen and that is a wall of blackboard paint.  I could do a whole entry on how much I love black board paint - maybe next time?

I found these adorable gingham loaf dishes at Homesense and they were my "jumping off point" - to use a little stylist lingo.   Obviously, I liked them so much I bought myself a couple!  Anyway, it was the perfect opportunity to use some of my vintage tablecloths that have been aching to be on television - I hope they don't get cut!  My Mom started me on this collection and it's a fun one.   Also, my Mother-in-law found this completely odd red and white tea set for three.  It's so unique - perfect for Christmas or Valentine's candies as part of a centre piece too.  

It's become even more fun to add my own stuff into reveals because my friend Missy tries to guess which things are my own personal stuff and which I purchased for the homeowner.   Don't worry...I never prop a whole room of my own stuff and then clear it all out so the homeowner is left with nothing.  That would be mean!  I just add an element or two...

So, keep posted to find out when you can see the whole kitchen on HGTV Canada - it was one of my favourites.   And feel free to write if you think you have guessed one of my own items correctly - I'll even tell you where I got it!  Or, watch last season's episodes and try to spot my knick knacks.  


Canadian Painters - Part I

There are many Canadian painters that I love and I wanted to share some of them with you.  It's hard to narrow down just a few, but I thought focusing on three to five at a time would be manageable.  I don't proclaim to be an expert, I just have an emotional reaction to pieces and feel drawn in by the images.   And lucky me, I get to pick pieces of art for the reveals of "Leave it to Bryan" on HGTV, which is one of my favourite parts of the process (sometimes I pretend I'm buying them for myself!)  It's great to see how a beautiful painting or photograph can really pull a room together.  
So, here is my first go at a list:
Connie Geerts (Image shown above is "Elusive")
Love her paintings and the feeling of something almost as though it's out of focus.  My favourites are her bears and Canadian geese.   
Brian Harvey (Image shown above is "Dundas & Keele")
I wish I could buy every last one of his paintings.   My favourite thing about some of his work is that it is so familiar and urban.  He has a great talent for making something that we look at every day, and possibly take for granted, look special and beautiful.
Mario Ricci (Image shown above is "Landscape 08")
It was Mario Ricci's work that I used in the reveal of "House of Bryan", Season 1.   His landscapes are simple, yet have such impact.   Especially the way they were grouped in the gallery style landing of Bryan and Sarah's house.    I'm not sure if his landscapes are my favourite or the emotional and loving images of dogs he paints.  It sounds like a cliche, but he truly captures their soul in his work. 
Have a look at the artist's websites to see even more of their stunning work.  Also, take a tour through the relaxed and inviting space that is Canvas Gallery on Dupont St. at Dovercourt - they have a great collection of local and Canadian artists.   
It's easy to find a Canadian artist that you love - there are so many!   Check back for more posts on my favourite ones.     

DIY: Bulletin Board

Here is a simple way to make a bulletin board.  It's a fast and easy way to add colour and interest to a room.   You can make it small or large, horizontal or vertical, even change the fabrics from square to square.

You will need the following; fabric, acoustic ceiling tiles (from any hardware store), glue gun and scissors. 

1. Cut fabric 1.5" larger than the ceiling tile you have chosen

2. Glue fabric to back of tile (the tile has a lip which is a great place for the glue)

3. Trim excess fabric

4. Attach tile(s) to wall in whatever pattern you choose.   The way you attach the tile will depend on the type of wall you are applying it to (I sound like Ikea instructions right now!)

5. Use regular push pins to attach objects.